Have you ever set your electric oven to bake, only to find your cookies cold or your lasagna nowhere near bubbling perfection? One common culprits in such scenarios is a bad oven element.
Recognizing a faulty oven element might seem challenging at first. However, with a bit of knowledge and some easy-to-follow tips, you can identify these signs without much hassle. Before you make a call to a technician or rush to buy a new appliance, let's explore how you can spot a failing oven element and what steps you can take to troubleshoot it.
- Signs of a Failing Oven Element
- How to Test Your Oven Element
- Common Causes of Oven Element Failure
- Tips for Replacing an Oven Element
Signs of a Failing Oven Element
In the cozy corners of our kitchens, where aromas blend to create our favorite meals, the role of an electric oven often goes unnoticed until it stops working as it should. Spotting the signs of a failing oven element can save you not only your dinner plans but also spare you some unexpected repair costs. One of the most evident signs is when you preheat the oven, and the temperature never reaches the level you set. You might hear the oven click, implying it's attempting to heat, but the inside remains stubbornly cold, almost as if your oven's heart isn't in its work anymore. This is typically a big red flag that your oven element might be faulty.
Another tell-tale indicator is the visual condition of the oven element. A healthy element should appear uniform and intact throughout its length. If you notice any bright spots or areas that have a blistered appearance while turned on, it's a sign that the element has started to burn out. This often results in uneven cooking, which can turn a home-cooked delight into a disappointing ordeal. An unexplained increase in your electricity bill despite regular cooking routines can also signal that something isn’t quite right with the element.
Strange noises, such as popping or a faint sizzling sound, can occasionally accompany a failing element. These are akin to a subtle SOS signal from your oven, suggesting that it requires immediate attention. If these signs are left unchecked, they can sometimes lead to more severe problems, or worse, a complete oven failure, which nobody desires right before a festive season or family gathering.
Larry Pilato, a recognized expert in home appliance repairs, mentions, "The sooner you detect a problem with your oven element, the easier it usually is to resolve. Ignoring it can lead to costlier repairs down the line."
It’s vital to be proactive about diagnosing your oven’s ailment. This starts with keeping a close watch on these signs and occasionally inspecting the element. A methodical check involves turning the oven on and observing how it behaves. Adept users often opt for continuity tests using a multimeter, measuring the element’s electrical flow, to confirm the suspected failure. Though this might be going into more technical grounds, it’s a reliable way to assess the element’s health. This detailed inspection routine can ensure your electric oven repair efforts are more targeted and efficient.

How to Test Your Oven Element
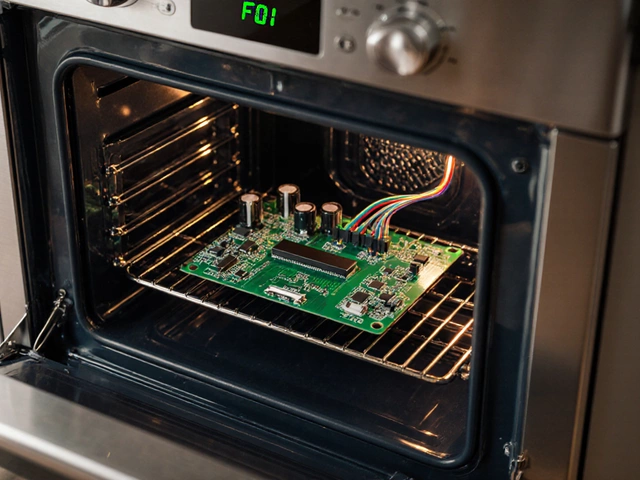
Testing your oven element might initially seem like a task best left for the professionals, but it's simpler than you might think—with some basic tools and a little guidance, you can determine if the element is the true suspect in your culinary mishaps. It's crucial to ensure your oven is unplugged before beginning, for safety's sake, as ignoring this step can result in a dangerous situation. Equipped with a multimeter, which you can find at most hardware stores or online marketplaces, you are fully prepared to be the detective on this kitchen crime scene.
Start by gaining access to the element itself. In many ovens, you'll find this immediately within the cavity—a metallic tube located along the back wall and usually visible without any additional removal. If unsure, do take a peek at the oven’s instruction manual or schematic, available from the manufacturer's website, to prevent any mishaps during disassembly. Once confident about the part you are dealing with, it's time to detach the element that connects it to the oven, frequently with the help of a screwdriver to loosen screws or clips. Ensure to keep these tiny pieces safe and out of reach from any adventurous young hands or paws.
With the element free, inspect it closely for any signs of physical damage—often, telltale signs manifest as blisters, breaks, or even ashen patches indicating burning. Even the smallest of these blemishes could lead to big heating problems and guarantee the advocacy for a replacement. For a more technical examination, dive into some math wonder with a trusty multimeter. Switch to the ohms setting, placing the probes onto the terminals of the element. A healthy oven element generally reads between 19-115 ohms—any reading significantly different can signal the need for reconsideration.
If a multimeter reads zero, it indicates no continuity within the circuit, meaning your oven element is not conducting electricity at all, and therefore cannot heat up as it should. On the other hand, if you receive a reading that is infinitely high, it suggests a break in the circuit requiring repair or replacement. This nifty gadget also reveals other interesting insights—like resistance and continuity, which relate hand-in-hand with the problems users often face without knowing.
As per a technician working in Home Appliance Specialists, "Sometimes, it’s both an issue of the element and the wiring. Checking both components will save a lot of troubles shi pieces of time" for a fiery New York Times-style quote.Use the data gathered from testing as an essential snapshot of the oven's electrical health, allowing you to fix, update, or optimize current and future baking adventures.
For the tech-loving DIYers out there, detailed logs of these readings allow for an even more comprehensive understanding of your kitchen's heart. Whether you are a novice yearning for knowledge or a seasoned chef ensuring top-tier performance, routine testing of the oven element pays dividends in the heart of the kitchen, where innovation, curiosity, and perfect bakes truly manifest.

Common Causes of Oven Element Failure
Understanding why oven elements fail can save you from repeated trips to the appliance store or calls to the repairman. There are several factors that can lead to the demise of your oven's heating element, and recognizing these can be the first step towards preventive maintenance.
One primary reason for oven element failure is age. Over time, the materials used in the heating element can degrade, particularly if the oven has seen a lot of use. This wear and tear gradually affect performance, leading to an eventual failure. It's often gradual, with the oven taking longer to heat or not reaching desired temperatures. Sometimes, you might notice the element looking uneven in its brightness during operation—that's usually a worn-out component struggling to heat up.
Electrical issues also play a significant role in element failure. Fluctuations in electric current can cause stress on the element. A sudden power surge, for instance, might cause the element to crack or break. Ensuring your oven is connected to a stable power supply, preferably via a surge protector, can help mitigate this risk. Additionally, faulty wiring within the oven itself can lead to failures, as poor connections can result in insufficient electrical flow, causing the element to underperform or burn out prematurely.
A stitch in time saves nine. Keeping an eye on small electrical problems can save you from expensive repairs later.
Another contributing factor is poor installation. An improperly installed element can cause hot and cold spots in the oven, leading to uneven baking or cooking. Such issues might strain the element, accelerating its failure. That's why it's important to follow the manufacturer's instructions carefully or consult a professional when installing a new element.
Regular exposure to spills and splatters can damage the element too. When food spills or grease find their way onto the element and get repeatedly burned on, it can lead to corrosion or hotspots. Regular cleaning is crucial to prevent such buildups. Additionally, the oven's own cleaning cycles, especially if it's self-cleaning, can wear the element out due to high heat exposure, further emphasizing the importance of a careful balance between cleanliness and maintenance.
Manufacturing defects, though rare, can also play a part. Not all elements are created equal, and sometimes there are inherent weaknesses in the materials or construction that aren't apparent until the element is in repeated use. This is where warranties and brand reputation come into play—investing in a reliable brand can often be more cost-effective in the long run. Keeping these possible causes in mind helps in making informed decisions, whether you’re troubleshooting an existing issue or simply maintaining your oven for better performance.
Tips for Replacing an Oven Element
Replacing an electric oven element may seem daunting at first glance, but with some careful attention and the right tools, it can be a manageable task. When an oven stops heating adequately, or not at all, the element is often the issue. Ensuring your kitchen's reliability for future meals requires a successful replacement, so it's essential to follow a few vital steps. Before diving into the replacement process, make sure to unplug your oven to avoid any chance of electric shock. This first safety precaution cannot be stressed enough, for it sets the stage for a safe and smooth operation.
Once safety is accounted for, gather essential tools: a screwdriver, a pair of pliers, and optionally, a multimeter to test the new element before installation. Begin by removing the screws that secure the element inside the oven compartment. Typically, your oven will have visible screws around where the element makes contact with the back wall, but be sure to consult your oven's manual if things aren't clearly visible. Afterward, carefully disconnect the wires attached to the element. Notice how they are connected, as you will need to attach these to the new element later.
Buying the Right Replacement
Matching your faulty element with the correct replacement part is crucial. Look for the element's model number or refer to your oven's manual for specifications. Most manufacturers sell replacement parts, and this model number will be your guide in finding the right match. Online reviews can give you additional confidence that you're choosing a higher quality part. A useful fact to keep in mind is that some faulty elements, even when replaced, might not fix a pre-existing problem if the real issue lies elsewhere. It's a good idea to verify other components of the oven are functioning as expected.The next step involves meticulously inspecting the connections on your new element. After making sure everything is compatible and ready for installation, carefully connect the new element by reattaching the wires in the same configuration as before. Then, secure it in place using the screws you previously removed. Double-check these steps before powering the oven back on. Making sure screws are tightly secured means you've checked for loose components, eliminating the risk of disconnection or rattling during operation. When you connect the oven back to power, set it to a high temperature to see if the new element heats up efficiently.
"Anyone handling repairs should prioritize safety and follow each manual step closely for accuracy," suggests Home Appliance Service magazine. "Proper handling and verifying each connection prevents mishaps."
Don't hesitate to call a professional if you find yourself uncertain during any part of this process. While replacing an oven's component can be manageable, there are instances where intricate knowledge and expertise come in handy. Knowing when to hand off the task to an expert ensures you don't risk larger issues such as electrical fault or damage to your kitchen.