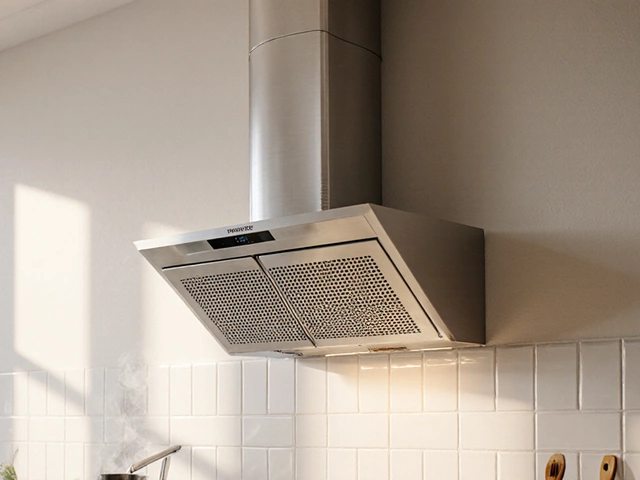
Thinking about installing an extractor fan yourself? Whether it's to whisk away steam from a hot shower or ensure your kitchen remains odor-free, an extractor fan can significantly improve the air quality in your home.
Before you roll up your sleeves, it's important to understand what you're getting into. This isn't just a case of plugging in a gadget—there's a bit of electrical work involved, and you'll want to ensure you're equipped with the right information for a safe and successful installation. Don’t worry, though. With the right guidance and a touch of patience, even a novice DIY-enthusiast can get it done.
In this piece, we'll explore the purpose of these handy devices, guide you through the tool checklist, and provide a detailed walkthrough of the installation steps. Plus, we’ll share safety tips to keep your work hazard-free and address some common hurdles you might face along the way. Ready to get started? Read on!
- Understanding the Purpose of an Extractor Fan
- Tools and Materials You’ll Need
- Step-by-Step Installation Process
- Safety Tips and Precautions
- Troubleshooting Common Problems
Understanding the Purpose of an Extractor Fan
Extractor fans play a pivotal role in maintaining the quality of indoor air, performing tasks that go far beyond mere convenience. These devices are designed to ventilate spaces plagued by moisture and unwanted odors, serving as an unseen ally in places like bathrooms and kitchens where humidity and cooking smells can run rampant. By actively drawing out moist air, an extractor fan helps prevent the accumulation of mold and mildew, which are not only detrimental to your home but also to your health. A damp environment is a breeding ground for these unsightly fungi, and using a fan can help keep such troublesome growth at bay. While windows can facilitate air circulation, they are not always sufficient, especially when external weather conditions are not ideal. Extractor fans step in as a reliable solution to maintain adequate ventilation.
These diligent devices don’t just combat humidity, they’re also excellent at improving air quality by reducing volatile organic compounds (VOCs) that emanate from household cleaning agents. VOCs can contribute to various health issues, particularly for individuals with respiratory sensitivities. Kitchens, being the culinary heart of our homes, often deal with smoke, steam, and food odors. Here, the extractor fan acts as a linchpin in ensuring a breathable, pleasant atmosphere by effectively removing cooking fumes. Moreover, these fans contribute to lowering indoor humidity, which is key in preventing the long-term degradation of your home’s structure. Excess moisture can slowly degrade your walls and ceilings, leading to costly repairs in the future.
Benefits Beyond Ventilation
While ventilation might seem like the primary function, extractor fans contribute significantly to energy efficiency. By maintaining a stable indoor climate, they help reduce the burden on heating, ventilating, and air conditioning systems, leading to energy savings and lower utility bills. Notably, with the right home ventilation systems in place, you are less likely to rely heavily on artificial cooling or heating, thus promoting a more sustainable lifestyle. It's fascinating how this small, often inconspicuous gadget can lead to a sizable positive environmental impact. According to a report from the Australian Energy Foundation, well-ventilated homes invariably require less energy to stabilize temperatures, leading to savings of up to 30% on energy costs.
"A well-maintained ventilation system is crucial not only for preserving the interior environment but also for optimizing energy use and promoting health," notes the Australian Building Codes Board.
However, choosing the right extractor fan is also essential. Considerations include the size of the room it will serve, the measured air changes per hour required, and noise levels. Modern smart fans even offer built-in humidity sensors, auto-start features, and WiFi connectivity, taking convenience a notch higher. As you plan your installation, these factors will paramountly drive your decision-making process to ensure that the fan you select best fits your lifestyle and needs.
Tools and Materials You’ll Need
Embarking on the task of installing an extractor fan doesn’t mean you need to transform into a local handyman overnight. But you do need to be equipped with the right tools and materials. First, you will need a good quality drill, ideally a cordless one, as it's more flexible to use. A set of drill bits suitable for masonry and wood will come in handy, as you'll likely be drilling through both. With a screwdriver set at your side, you’ll tackle fastening tasks with ease. Notably, a Phillips head will probably see the most action.
Another key instrument is the utility knife, indispensable for cutting through drywall when creating an opening for the fan. Don't forget a tape measure for precise measurements, as fitting snugly in a too-large or too-small hole can lead to complications. When heading to the store for your materials, make sure to pick up wall anchors and screws that are suited specifically to your wall type. Whether made of drywall or something sturdier like concrete, every wall demands certain fasteners.
Home ventilation is best executed with the right materials. Always begin with the extractor fan itself, chosen to fit the requirement of its destined space. Bathroom fans usually fall around the 50 to 100 CFM (cubic feet per minute) range, while larger areas like kitchens need a more robust solution. Don't skimp on duct tape and ducting that the fan manufacturer recommends—these will help guide air outside, making the unit effective. Speaking of which, ensure you match the duct size to the fan's output for optimal performance.
Remember the significance of safety equipment. Protective goggles guard against dust and debris, and a dust mask shields you from inhaling particles. Electricity can be tricky, hence you might consider a current tester. Just a simple one can confirm the absence of active power lines behind your work area, ensuring a shocking surprise doesn’t meet you.
“The best preparation for tomorrow is doing your best today,” wisely put by H. Jackson Brown Jr., a reminder that having every tool and material at the ready can make the seemingly daunting task of DIY fan installation quite achievable.
For those tingling at the fingertips to start, follow this setup, and gather what's necessary. It's a bit like preparing a feast: the right ingredients make the dish. Here, the toolkit forms the basis of a successful DIY installation, keeping your home's air fresh and healthful.

Step-by-Step Installation Process
Installing an extractor fan might sound like a task that's reserved for expert electricians, but with a little guidance, it becomes a straightforward job any DIY enthusiast can tackle. Before embarking on the installation journey, ensure you've gathered all necessary tools, which include a drill, screwdriver, duct tape, and a stepladder. Keep safety in mind at all times, and remember to switch off the main power supply when dealing with any wiring. The following steps will guide you through the process of installing the extractor fan with as much ease and precision as possible. You will need to follow each step carefully and check your progress as you go to ensure a successful installation.
Select the Location
Choosing the right location for the fan is crucial. Ideally, it should be mounted on an external wall to effectively expel air outside. For bathroom fans, placing the unit close to the shower or bath is advisable. If you're working in a kitchen, positioning it near the cooking area is key. Any areas you choose should be free of obstructions like beams or pipes. Start by marking where you'd like the fan to go. Cut a small pilot hole to inspect for any obstacles, and ensure there's adequate space for the ducting.
Mount the Fan
- Using your selected fan template, trace the outline on the wall or ceiling. Cut along the line carefully with a plaster saw. This opening should adequately fit the fan housing.
- Direct your attention to the wiring next. Run a cable from a power source to the fan's location. This step may require running the wire through your house's structure, which sometimes involves fishing it through walls or ceilings. Use a cable detector to avoid existing wires.
- Secure the fan into place using screws. Make sure it’s tight and flush against the wall or ceiling to prevent any vibrations or noise during operation.
Wiring the Fan
Connecting your new unit to the electrical supply is the heart of the installation. Strip the ends of the wires and connect them to the corresponding terminals of the fan unit. Match the colors and ensure each connection is secure. You might need cable connectors for a more secure fit. Always double-check your connections before proceeding. Many fans come with wiring diagrams printed on them for reference. If you’re unsure about any step, it's wise to consult an electrician for guidance.
Ducting and Ventilation
With the fan securely mounted, it’s time to install the ducting. This crucial part directs the extracted air outside the building. Flexible ducting is often preferred because of its ease of installation. Cut the duct to length and attach it to the fan housing and the external vent. Seal all joints with duct tape to ensure there are no leaks, which can result in reduced efficiency. Another piece of advice is to make sure the duct runs are as short as possible to increase performance.
Final Checks and Testing
Now that your fan is in place and wired up, it's time for the moment of truth. Restore the power and test your fan. Listen for any unusual noises and feel for proper suction power. You should notice a significant draft towards the fan, indicating it's working correctly. If there are issues, inspect all connections and ensure the ducts are not obstructed. This step is all about making sure everything operates exactly as it should, so take the time to resolve any issues before calling it done.
Safety Tips and Precautions
Before embarking on your DIY journey to install an extractor fan, safety should be your main focus. Handling electrical components, climbing ladders, and dealing with tools requires an extra layer of caution, especially if you’re new to this kind of work. One crucial step is ensuring that you turn off the power supply to the area you’ll be working in. This isn’t something to overlook, as it’s key to avoiding electrical shocks. Use a voltage tester to double-check that the power is truly off before you get started.
When choosing the location for your fan, think about where you're going to be working. Make sure you have sturdy support beneath you if you’re ladder-bound to reach high spots. A tumble from even a moderate height can lead to serious injuries. Keeping your work area organized also plays a fractional role. Nothing slows down progress like a cluttered workspace. Place your tools and fan parts in an accessible manner, reducing the need to stretch or maneuver awkwardly, which could lead to accidents.
Wiring and Electrical Safety
One of the trickier parts of installing an extractor fan is handling the wiring. If you’re not confident in your electrical skills, there’s absolutely no shame in calling in an expert. But if you’re set on doing it yourself, be sure you know what you’re doing. Pay attention to your local wiring regulations. Some areas have strict guidelines on what a homeowner can and can’t handle electrically, so it’s worth doing your homework.
"Safety is not just a slogan, it’s a way of life." – Unknown
Even something as straightforward as connecting wires can turn into a mess if you miss a step, which is why reading through the fan’s installation manual is necessary. Manufacturers provide these instructions with detail for a reason. Follow them closely, and don’t hesitate to swing by online forums or DIY communities if you need additional insights or tips. Experienced individuals often share nuggets of wisdom that save you trouble down the line.
Using Protective Gear
As mundane as it might sound, donning the correct protective gear cannot be understated when working on this project. Safety glasses can protect your eyes from debris, especially if you’re cutting through walls or working in tight spaces. Gloves provide grip and insulation, minimizing the risk of accidents. A dust mask can be invaluable if you’re installing the fan in a particularly dusty environment like an attic or during renovations.
It’s easy to overlook some of these small precautions amidst the excitement of a DIY endeavor, but they make a world of difference. You’ll not only be safeguarding yourself but also potentially increasing your productivity as you won’t be slowed down by avoidable incidents. Remember, patience during setup can prevent a multitude of mishaps and truly set the stage for a successful and seamless installation.

Troubleshooting Common Problems
Even the most diligently installed extractor fan can occasionally present a few hiccups. Fear not, as these issues are typically easily rectified with a bit of know-how. A common grievance homeowners encounter is inefficiency in air extraction, often indicated by persistent humidity or odors. This might be due to a lack of adequate sealing around the fan or duct, leading to air leaks. A smart fix is to ensure that all connections are tightly sealed with quality duct tape or caulking. Check the path of the ducting, ensuring it's neither too long nor kinked, as poor ducting layout can significantly hinder performance.
If the extractor fan isn't running at all, the problem could lie in the electrics. First, inspect the circuit breaker to ensure it hasn't tripped. If the issue persists, a faulty switch or wiring might be at fault. This might require a more in-depth investigation which, if uncomfortable, is best left to a licensed electrician. Never forget, working with electricity requires the utmost caution—ensuring power is off before investigating is crucial. Another frequent problem includes excessive noise. Extractor fans should operate relatively silently, and if you notice a grinding or rattling sound, it could be due to debris lodged within the fan or an imbalance in the rotor blades. A gentle clean with a soft brush can work wonders in clearing out accumulated dirt that might be contributing to this problem.
Occasionally, homeowners encounter difficulties with fans not switching off or fans that seem to run intermittently without manual operation. This could be a programming malfunction in models equipped with timed or humidity sensors. Refer to the user manual, as a reset procedure might be indicated by the manufacturer. A noteworthy reminder is that settings can often be inadvertently altered, causing anomalies in operation. Manager of Product Development at FanCo, Jamie Helmsworth, once stated,
"Often, the answer is simple—it's just that folks rarely think to consult the manual until after they’ve expended a good deal of energy getting stressed."
To document common issues and find definitive solutions, keeping a simple troubleshooting journal can be invaluable. Document when issues occur and any attempted fixes. This can help track and predict problems, leading to faster resolutions. For the adventurous handyman, inspecting the motor might be warranted. Every motor needs some TLC now and then, and careful lubrication with motor oil can breathe life back into an ailing fan. If your extractor fan still falters after running through these checks, it might be time to reassess installation, possibly pointing to more significant underlying deficiencies like incorrect placement or size for the room’s needs. For ensuring long-lived efficiency, remember to clean and maintain the fan regularly.
It's important to address problems as soon as they arise to maintain a healthy home environment. Despite the occasional bump, a well-maintained extractor fan offers peace of mind, improved air quality, and a mold-free home. Blowing off steam takes on a whole new meaning with the installation of a properly functioning fan. So, roll up those sleeves and let your residential DIY skills shine, keeping your home's air fresh and ventilation effective!


