Extractor Fan Maintenance Scheduler
Maintenance Tasks Overview
Track your extractor fan maintenance tasks with this interactive scheduler.
Safety Reminder
Always turn off power before servicing. Use a voltage tester to confirm.
Upcoming Maintenance Tasks
Maintenance Timeline
Filter Maintenance
Clean every 3 months to prevent grease buildup and maintain airflow.
Blade Cleaning
Wipe blades and housing every 6 months to reduce noise and wear.
Extractor fan servicing isn’t rocket science - with the right tools and a step‑by‑step plan you can get it running smoothly again and avoid costly call‑outs.
Key Takeaways
- Turn off electricity before you start.
- Remove and clean the filter at least every three months.
- Check the duct for blockages annually.
- Inspect the motor and wiring for wear each year.
- Re‑test fan speed after reassembly to confirm proper airflow.
Understanding Your Extractor Fan
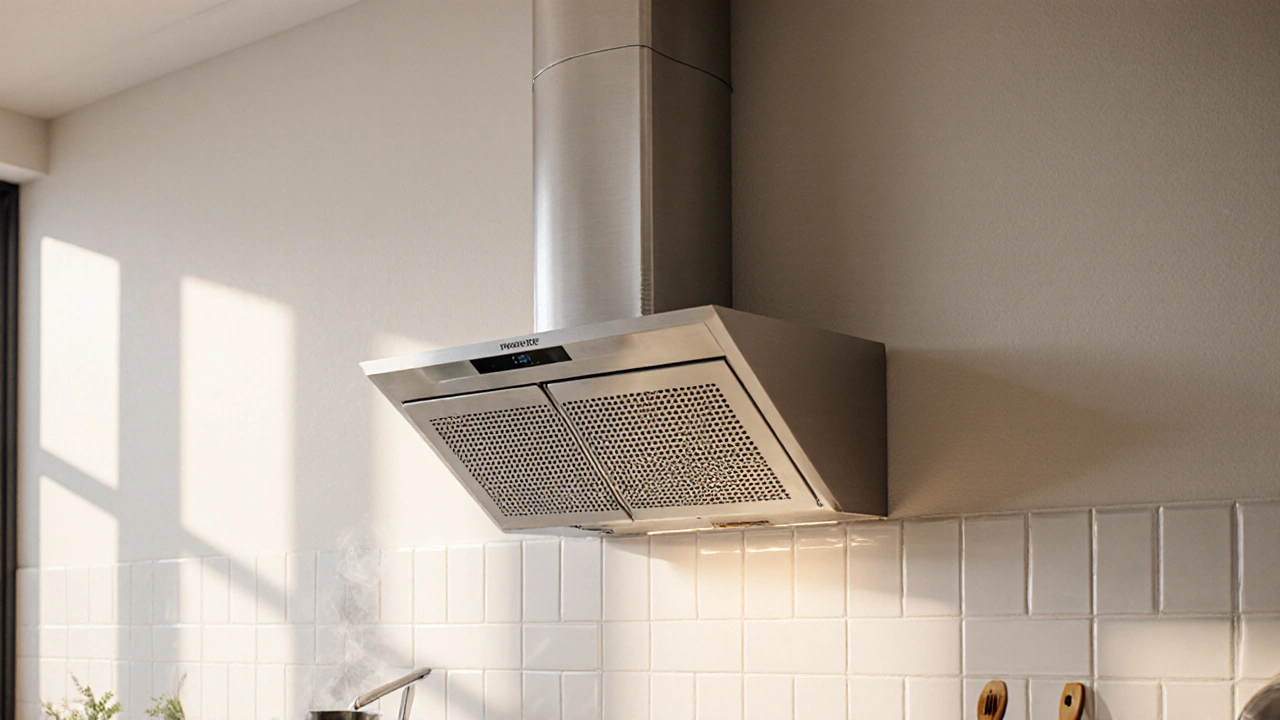
When we talk about an extractor fan is a ventilation device installed in kitchens or bathrooms that pulls moist or odorous air out of the room and pushes it through a duct to the outside. Typical specs include an airflow rating of 300-900CFM (cubic feet per minute) and a power draw of 40-70W. Extractor fans come in wall‑mounted, ceiling‑mounted or inline varieties.
The core components you’ll be working with are the motor a 120‑V, 50‑60Hz brushless unit that spins the fan blades at 1,200-1,800RPM, the filter usually a removable aluminium or charcoal mesh that traps grease and dust; mesh size is typically 0.5mm, the duct a rigid aluminium tube that carries the extracted air to the exterior; common diameters are 100mm or 150mm, and occasionally a humidity sensor a small electronic module that boosts fan speed when moisture levels exceed 60%. Knowing where each lives helps you target the right cleaning step.
Safety First
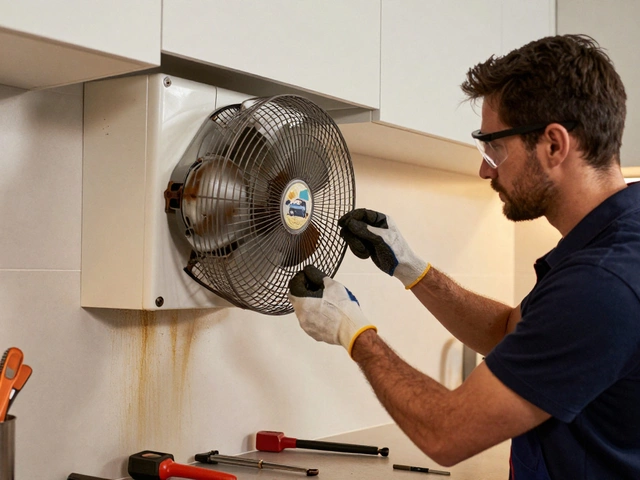
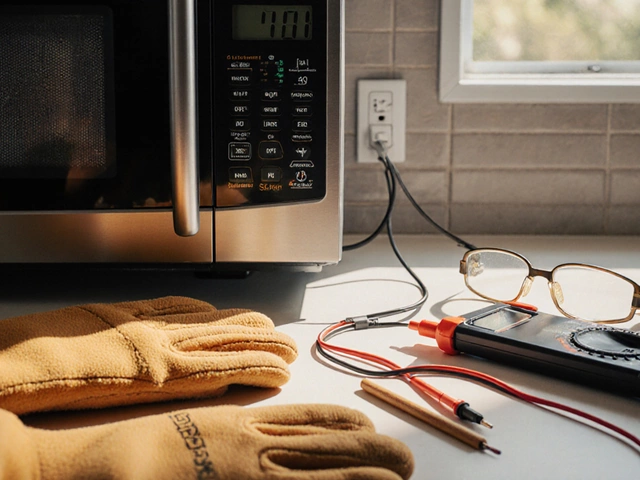
Before you lift the cover, always switch off the circuit at the breaker. A quick test with a non‑contact voltage tester confirms the wires are dead. If the fan is ceiling‑mounted you’ll likely need a ladder a sturdy, 6‑foot step ladder with anti‑slip feet. Keep a screwdriver Phillips‑head, 5‑inch tool handy for removing screws, and wear gloves to protect your hands from sharp edges.
Step‑by‑Step Service Procedure
- Power down and secure the work area. Flip the breaker, place a warning sign, and double‑check with a voltage tester.
- Remove the outer grille. Most fans have 3‑4 screws. Use the screwdriver to loosen them, then gently pull the grille away. Set the screws in a small tray.
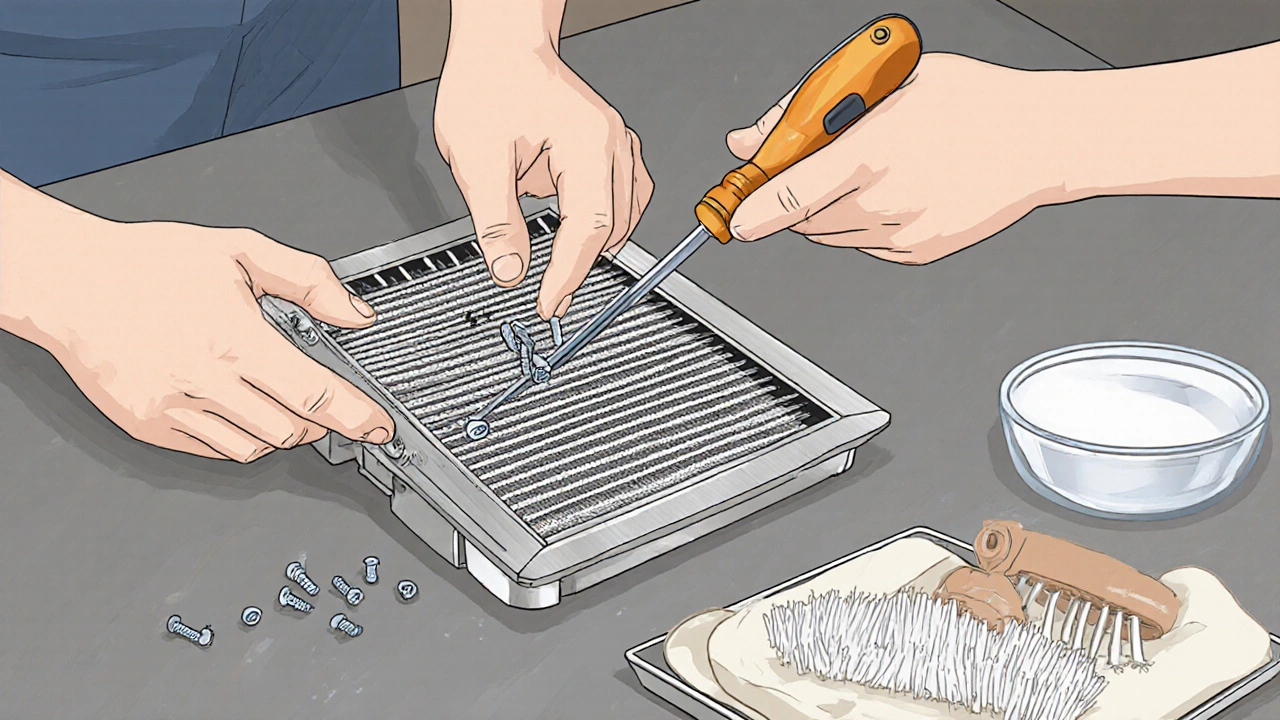
- Take out the filter. The filter slides out or lifts off. If it’s a metal mesh, tap it lightly to dislodge grease. Soak it in hot, soapy water for 10minutes, then rinse and let dry completely.
- Clean the fan blades and motor housing. Using a soft cleaning brush a 3‑inch nylon brush with stiff bristles, wipe away dust and accumulated grease from the blades. For stubborn grime, dip a cloth in a 1:1 mix of water and white vinegar, then wipe clean. Avoid spraying liquids directly on the motor.
- Inspect the motor and wiring. Look for any frayed insulation, burnt marks, or loose connections. If you spot damaged wires, tighten the terminals or replace the motor coil - this is usually a job for a professional.
- Check the duct for blockages. Detach the duct from the fan housing (usually a clamp or screw). Shine a flashlight inside; if you see soot or bird‑nest material, clean it with a flexible duct brush. Re‑attach the duct ensuring a tight seal.
- Re‑assemble the fan. Place the filter back, secure the grille with the saved screws, and restore power at the breaker.
- Test the operation. Turn the fan on. You should hear a steady, low‑hum and feel a noticeable airflow at the grille. If the speed seems low, revisit the duct connection or the motor brushes.

Maintenance Schedule & Tips
Regular upkeep keeps the fan efficient and extends its life. Below is a handy schedule you can paste onto your fridge.
| Task | Frequency | Why it matters |
|---|---|---|
| Clean filter | Every 3 months | Prevents grease buildup that reduces airflow |
| Wipe blades & motor housing | Every 6 months | Reduces noise and wear on bearings |
| Inspect duct | Annually | Avoids blockages that can cause back‑pressure |
| Check wiring & motor | Annually | Catches early signs of electrical failure |
Extra tips: use a shop‑vac with a narrow hose attachment for the filter, avoid abrasive cleaners on metal parts, and always let components dry completely before re‑assembly.
Common Problems and When to Call a Pro
Even with diligent care, some issues need a trained technician. Look out for:
- Motor humming but no airflow. Likely a burnt bearing - replacement is best left to a pro.
- Intermittent operation. Could be a faulty humidity sensor or loose wiring.
- Excessive vibration. May indicate a bent blade or misaligned motor mount.
- Persistent bad smells. Might be a duct leak that’s pulling in attic air; seal with foil tape.
If you encounter any of these, replace the part or schedule a professional service to avoid safety hazards.
Frequently Asked Questions
How often should I clean the extractor fan filter?
A good rule of thumb is every three months, or sooner if you do a lot of frying. Regular cleaning stops grease from choking the motor.
Can I use a regular household vacuum on the fan blades?
Yes - attach the narrow hose and a soft brush head. Avoid the brush roller; it can scratch the metal blades.
What safety gear do I need while servicing?
At minimum wear insulated gloves, safety glasses, and a dust mask if you’re cleaning a greasy filter. A stable ladder or step stool is essential for ceiling fans.
Should I lubricate the motor bearings?
Most modern extractor fans have sealed bearings that don’t need oil. If the manufacturer specifies a light silicone spray, use only a few drops.
How do I know if the duct is sized correctly?
Check the fan’s spec sheet - it will list the recommended duct diameter, usually 100mm for residential units. A duct that’s too small causes back‑pressure and louder operation.
What signs indicate the motor needs replacement?
Listen for grinding noises, notice a drop in airflow, or feel the fan stall when you turn it on. Warm spots on the housing also point to a failing motor.