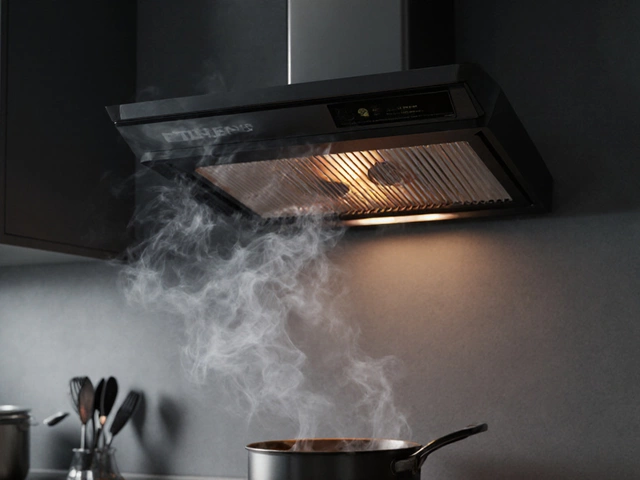
Extractor fans do a lot more than just snatch away cooking smells—without them, the kitchen quickly turns into a muggy mess. But if yours buzzes like an angry bee, barely moves air, or refuses to spin at all, chances are the motor's shot. Ignoring a failing motor is a recipe for clouds of steam and lingering fried fish smell (and yeah, Whiskers is not a fan of that either).
You don’t need to call in a pro for every little hiccup. Replacing a kitchen extractor fan motor is usually pretty doable if you know what’s involved. In most cases, the trickiest part is figuring out which replacement motor you need, followed by a few careful steps with the wiring and screws. No fancy tools—just a bit of patience, a screwdriver, and maybe some needle-nose pliers if things get fiddly.
Before grabbing any parts, though, check for the most common trouble signs: the fan making weird grinding noises, stalling out after a few seconds, or sending out a burnt smell. Sometimes, a good cleaning will help, but if the noise sticks or the motor stays hot, it’s time to swap it out.
- Spotting a Worn-Out Motor
- Choosing the Right Replacement Motor
- Step-by-Step Motor Swap
- Tips for a Safe and Efficient Repair
Spotting a Worn-Out Motor
Wondering if your kitchen extractor fan motor is really the problem? Most folks miss the early warning signs because they blend into normal kitchen noise. But there are clues that shouldn’t be ignored.
- Strange Noises: If your fan starts to grind, rattle, or squeal, that’s the sound of worn-out bearings or a seizing motor. A healthy fan usually hums quietly in the background.
- Reduced Airflow: If your extractor is now mostly circulating steam rather than pulling it outside, the motor might not be reaching full speed.
- Fan Won’t Start or Stops Suddenly: A motor that takes several goes to start—or stops after running for a short bit—may have a faulty capacitor or burnt-out windings.
- Burning Smell: That sharp, plasticky burnt odor is serious. It means the motor’s likely overheating or the insulation on the wires is breaking down, which can be a fire risk.
- Motor Feels Hot: It’s normal for motors to get warm, but if yours is too hot to touch, that’s a sign of a bigger issue.
Folks often ask how long these motors usually last. Depending on usage and quality, you’ll get five to ten years out of most extractor fan motors. Extraction fans in busy kitchens might chew through a motor quicker, especially if greasy air gums up the works.
| Warning Sign | What It Means |
|---|---|
| Loud grinding sound | Bearing failure, worn motor |
| Poor airflow | Weak motor, clogged filters |
| Won't start | Dead motor, bad capacitor |
| Burning smell | Overheating, electrical fault |
| Excess heat | Motor overworked or failing |
Here’s a tip: always clean the filters and housing first. Sometimes what seems like a dead extractor fan motor is just a blockage or gunk slowing things down. If the fan stays loud, gets hotter, and airflow’s still weak after cleaning, your motor’s definitely on the naughty list.
Choosing the Right Replacement Motor
Getting the right motor is crucial. Don’t just grab the first one that fits—kitchen extractor fans come in different shapes, sizes, and speeds. The wrong motor may not move enough air, and you’ll end up with more steam than suction. Worse, you risk blowing out the electrics (and trust me, tripping the kitchen circuit during dinner isn’t fun).
First things first: check your extractor fan label or manual for a model number and power rating, usually shown in watts. Most motors for domestic kitchen fans range from 15W to 30W for standard hoods, but high-powered units (especially if you cook with lots of oil) go higher. If you don't see a label, snap a photo of the old motor’s sticker or engravings—most replacements just need the make and model to match up.
- Extractor fan motor size must match the mounting bracket and housing—standard diameters are 100mm or 120mm. Always measure your old motor's diameter and shaft length.
- Double-check voltage. Most UK kitchens use 220-240V, but if you're in the US, it might be 120V. Wrong voltage = fried motor.
- Fan speed is measured in RPM (revolutions per minute). If you cook a lot, look for a fan with a higher CFM (cubic feet per minute) rating, as this tells you how much air it can move.
- If your motor powers both the fan and the light, check if it’s a combined unit or split—don't assume they're all the same.
Here’s a quick table showing typical specs for common kitchen fan motors:
| Feature | Standard Value | What to Check |
|---|---|---|
| Diameter | 100mm/120mm | Measure your old one |
| Power | 20-30W | Match wattage |
| Voltage | 220-240V (UK/EU), 120V (US) | Check local specs |
| RPM | 1200-2500 | Higher = faster |
Still unsure at the shop? Bring your old motor or at least a clear photo—most hardware stores or online shops will help you hunt down a match. If you order online, read reviews in case some brands don’t line up like they promise (some ‘universal’ motors are anything but). Once you have the right part, you’re halfway there.

Step-by-Step Motor Swap
Alright, let’s get your extractor fan motor swapped out. This isn’t wizardry—just basic DIY done right. Start by cutting the power at the breaker. Flipping the fan’s switch alone isn’t safe; you don’t want to risk a nasty shock while working with wires.
- Remove the Cover: Most kitchen extractor fans have a plastic cover held in place by quick-release tabs or a couple of Phillips screws. Pop these off and set the cover aside somewhere safe.
- Locate the Motor: You'll usually see the fan blades connected directly to the motor. For most units, the motor sits in a visible mount or bracket. If you see layers of dust and grease, give it a quick wipe-down; you don’t want grime dropping everywhere.
- Disconnect the Wires: Snap a photo of the wiring setup before unplugging anything. Most extractor fans have two or three simple wire connections (live, neutral, and sometimes earth). Gently loosen the wire connectors with a screwdriver and pull the wires free.
- Remove the Motor: Motors are typically fastened by two or four screws. Unscrew these and keep them—you’ll need them later unless your new motor comes with its own set. Carefully slide out the old motor, taking care not to bend the blades if they’re attached.
- Install the New Motor: Slot the replacement motor into the same spot. Match up the screw holes and fasten it in. Make sure it feels snug, but don’t overtighten; overtightening can crack cheap plastic mounts.
- Reconnect Wires: Follow your reference photo and hook the wires back up: live to live, neutral to neutral, earth if present. Tuck the wires back carefully so they don’t touch the spinning blades.
- Test the Fan: Before you put everything back together, flip the breaker back on and run a quick test. Make sure the motor spins up smoothly and the fan isn’t wobbling or making odd noises. If something seems off, cut power and double-check your wiring and mounting.
- Replace the Cover: Once it’s working right, snap or screw the cover back in place. Double-check for any leftover screws—nothing worse than discovering you missed a step after everything’s closed up!
Some kitchen extractor fans may have extra insulation or soundproofing. Don’t skip reinstalling this stuff—it really does cut down on annoying humming.
| Motor Power | Typical Voltage | Typical Fan Diameter | Average Replacement Time |
|---|---|---|---|
| 15–30 watts | 230V (UK/EU), 120V (US) | 100–150mm | 30–60 minutes |
Got a fan that’s old or weirdly shaped? Sometimes models over 10 years old use discontinued motors, but there are universal fit motors out there—just match the wattage and voltage. Don’t forget safety glasses if you’re working overhead; even a tiny fan blade scrape smarts more than you’d think.
Tips for a Safe and Efficient Repair
Before you even touch the fan, hit the power—flip the breaker or unplug it. A lot of people skip this and end up with a shocking story to tell. Never trust just a light switch, since some fans have power routed through a separate circuit. Use a voltage tester to double-check; it’s cheap and could save you a nasty zap.
Keep your space safe and organized. Clear the area under the extractor fan, lay down old towels in case screws or small parts drop (they always do), and keep all removed screws in a cup or jar for easy tracking. It’s a lot better than crawling on the floor later, trust me.
When disconnecting wires, take a quick picture with your phone. Color codes on wires aren’t always reliable because past repairs or replacements can leave things mixed up. Having a snapshot makes reassembly way less confusing. If you run into connectors that don’t want to budge, wiggle don’t yank—gentle pressure does the trick without snapping anything.
- Always wear gloves. Metal fan housings can have sharp edges. Even if you’re careful, you can catch a knuckle when reaching into tight spots.
- Double-check the replacement motor and fan blade fit before bolting everything down. Sometimes, new parts look right but have a slightly different shaft size—don’t force it, as that can ruin the motor or fan blade.
- If you use power tools to fit screws, set them to the lowest torque. Over-tightening can crack the plastic housing or strip screw holes.
- Once everything is wired and secured, run a quick test (power on for a few seconds) before fully reassembling the cover. This way, if something hums or rattles, you can fix it without having to tear everything down again.
One more thing—using a vacuum or brush to gently clean out the fan casing before installing the new extractor fan motor gives you a fresh start. Caked-on grease can shorten the life of your brand-new motor fast.


