Electric ovens are a staple in the modern kitchen, yet even the most reliable appliances can hit a snag. Whether it's a baking disaster or a Sunday roast gone cold, knowing how to tackle basic oven issues can make a world of difference. Armed with a bit of know-how, you don't have to be an engineer to troubleshoot problems that might otherwise dampen your culinary efforts.
Diving into diagnosis doesn't require a toolbox filled with pricey gadgets, just a little curiosity. With some practical guidance, understanding why your oven isn’t heating or acting up can become a surprisingly straightforward task. From the power supply to the internal components, let's explore some solutions that might just get your oven back in action.
- Identifying Power Problems
- Checking Heating Elements
- Examining Thermostats and Controls
- Resolving Common Error Codes
Identifying Power Problems
When your electric oven decides to take an unscheduled nap, the culprit is often rooted in its power source. Look at this first: a disruption can be caused by something as simple as a loose plug or a tripped circuit breaker. It's surprising how often people overlook these basics while worrying about more complex issues. The first step in oven troubleshooting is checking if the power cable is securely plugged into the outlet. Be sure the connection isn’t shaky, which could interrupt the flow of electricity.
If your electric oven is still unresponsive and you've eliminated a loose cable as the issue, step back and consider the circuit breaker. These are finicky guards of your home's electrical system and might have flipped off due to overload. Head to your breaker box and check if the oven's breaker is in the 'off' position. Resetting it could wake your oven from its unplanned siesta. You’d be amazed at how often this fixes the problem, particularly in older homes where electrical systems can be temperamental. If the circuit trips again, delve deeper by considering potential overloads caused by additional appliances drawing power from the same circuit.
In some instances, the power problem could stem from a blown fuse. Many homeowners might not be aware that certain oven issues can trickle down to this small, yet significant component. Unlike other appliances, some electric ovens have internal fuses that prevent electrical overload and short circuits. Dig out your oven's manual; it likely has a diagram guiding you to its internal compartments. Disconnect the oven from the power source before reaching into its guts, then inspect for blown fuses — often identified by a crack or a discoloration within the fuse glass.
If all else fails and the problem persists, this might be a fitting moment to call upon a professional electrician. It's vital to know there are some issues that might exceed a DIY enthusiast's capability. An expert will be able to assess if the problem is rooted in the wiring itself, offering safe solutions and preventing potentially dangerous situations.
A mere understanding of power issues can mean the difference between a simple fix and an expensive service call. "A little knowledge in troubleshooting can go a long way in maintaining your appliance's longevity," advises appliance expert Bob Vila.
By tackling these straightforward steps, you’re not only saving time but potentially salvaging a delicious dinner on the brink of ruin. Always remember, the goal is to invite cooking joy back into your kitchen, with your oven happily humming away as it bakes, roasts, and warms your meals to perfection.

Checking Heating Elements
The heating elements in your electric oven are responsible for transforming electricity into heat, enabling you to bake and roast to perfection. When these elements fail, it can lead to uneven cooking or an oven that doesn’t heat at all—both frustrating outcomes for any cook. To get started, safety first! Make sure your oven is completely off and unplugged. Now, take a close look at the elements. Are there any visible signs of damage like burn marks or blistering on the coil? This kind of wear and tear might indicate a burnt-out element, a common cause of oven problems.
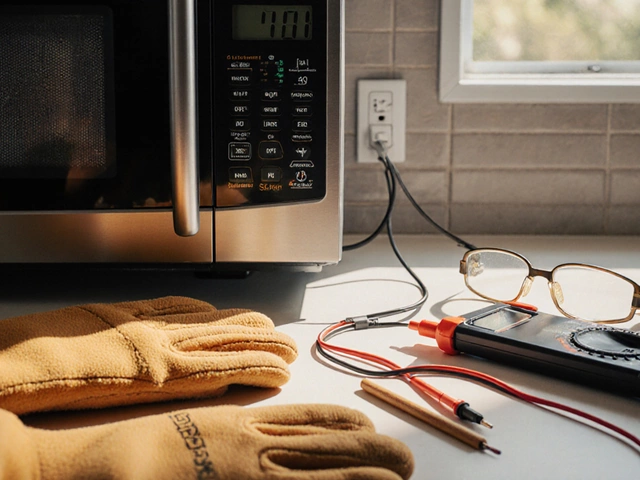
After a visual inspection, the next step is to test the element's conductivity using a multimeter, a handy tool that measures electrical resistance and determines if the current is flowing as intended. Set the multimeter to the ohms setting and touch the probes to the terminals of the heating element. A functioning element should show a reading typically between 10 and 50 ohms. No reading or a very high one suggests a break in the circuit, meaning the element needs replacing. This is a straightforward task; just ensure you have the correct replacement part designed for your oven's model.
If you are not comfortable performing these measurements, sometimes it’s best to call in a professional, but knowing these steps can save you time discussing specifics with a technician. It’s also a great way to build up some DIY confidence. According to John Dewey, a professional appliance repair technician, understanding the basics of oven repair can save both time and money:
"Many oven problems seem daunting at first, but with a little patience, homeowners can often solve the issue themselves, avoiding a pricey service call."This insight holds true especially for checking and replacing heating elements, a frequent issue with straightforward solutions.
Heating issues are sometimes attributed to more than just the elements themselves. Another factor to consider is checking the connections where the elements plug in. A loose or corroded connection can mimic the symptoms of a faulty heating element. If you find any grime or debris around these areas, carefully clean them with a small brush or cloth. Ensuring the elements are properly connected enhances optimal oven performance. Elements should be securely fastened, and this simple maintenance check can often resolve heating issues without the need for part replacements.
While examining the heating elements, take a moment to appreciate their efficiency. Electric oven elements typically convert about 85-90% of their electrical energy directly into heat. This efficiency makes electric ovens a popular option for households seeking reliable cooking appliances that are easy to maintain. If there are still mysteries about your oven heating issues, consider consulting your oven's manual or reaching out to the manufacturer for model-specific advice, as subtle design differences can influence troubleshooting steps.

Examining Thermostats and Controls
When it comes to diagnosing why an electric oven isn't reaching desired temperatures, checking the thermostat is a crucial step. The thermostat is the brain of your oven, ensuring everything is baking at the right heat. If your cakes are consistently undercooked or overbaked, despite following recipes to a tee, then your thermostat might be the culprit. Start by visually inspecting the thermostat settings and ensure they haven’t been accidentally changed. A faulty calibration often leads to inaccurate temperature readings, so it’s essential to check if what the dial says matches what the oven actually displays.
Moving deeper into troubleshooting, you'll want to test the thermostat with an oven thermometer, a handy tool that doesn't cost much. Place it inside the oven and set the oven to a specific temperature. After allowing time for preheating, verify if the thermometer matches the set temperature. If there's a significant discrepancy, it might be time to replace the thermostat. In some ovens, you can recalibrate the thermostat manually, but consult your oven's manual for these detailed instructions. This might just save you a trip to the repair shop.
Assessing the Controls
Your oven's controls are like the command center, involving knobs or digital displays depending on your model. If your oven isn’t responding as it should, the controls might be faulty. Sometimes the simple act of unplugging and replugging the oven can reset its internal systems. You'd be surprised at how often resetting can solve what seemed to be major problems. For technologically advanced models, it might be a matter of a worn-out sensor or a problem in the control board. In such cases, a technician may be needed. But before you call anyone, make sure there aren’t any obvious loose connections or visible damages within reach.
Moreover, it's worth mentioning that continuous usage without regular maintenance can accelerate wear and tear on controls. Caked-on grease or food particles can slip into small crevices, interfering with their functionality. Carefully cleaning knobs and displays with a damp cloth occasionally prevents such build-ups. Interestingly, it's noted by energy experts that slight tweaks to your cooking habits, such as preheating only when necessary, can prolong the lifespan of these components. Remember, small changes in maintenance routines can make all the difference in preserving electric oven controls.
"Routine maintenance is the secret to the longevity of appliances; neglecting minor issues is like inviting larger problems," says Thomas Sutherland, a seasoned home appliance specialist.
Finally, while many of us try to be savvy home chefs by exploring culinary creations, we sometimes overlook the health of our cooking tools. Regularly auditing your oven's thermostat and controls ensures that whether it’s a feast or a weekday dinner, your meals turn out as expected. Keep in mind that a stitch in time saves nine, particularly when it comes to diagnosing oven issues and ensuring safe culinary adventures.

Resolving Common Error Codes
Electric ovens, like any sophisticated gadgetry, sometimes flash enigmatic error codes that can be a puzzle. Understanding these codes is like learning a new language, but it's not as difficult as it seems. Each code corresponds to a specific issue, and decoding them can drastically cut down the frustration linked with an uncooperative oven. One of the usual suspects demanding attention is the F1 error code, commonly indicating a faulty sensor or electronic oven control. If such an error graces your display, it often means that an internal part isn't communicating well with the oven's brain. Restarting the oven—a simple 'turn it off and on again' move—can be surprisingly effective, but if the code persists, it's time to dive deeper.
Other codes like F2 or F3 often refer to temperature irregularities. Your oven possibly thinks it's a superhero capable of spontaneous combustion! Here, a quick check of the oven's temperature sensor might reveal the culprit. It's a small, bulbous component inside the oven cavity that can sometimes get dislodged or wear out. Ensuring proper connections not only maintains performance but also accuracy when cooking. Swapping out the sensor, if needed, is affordable and can be done with a Phillips screwdriver and a touch of patience.
The notorious F9 code often points to a door latch problem, especially during the self-cleaning cycle. These latches are designed to keep the door tightly sealed during high-temperature operations. If they act up, it prevents the oven from locking, and sometimes, from even starting. Prevention is key here—always keep an eye on the latch's cleanliness and operation. Occasional lubrication with heat-resistant oil can prolong its aversion to error codes.
"Modern appliances are surprisingly intelligent, yet users often underestimate their diagnostic abilities," says Martha Nguyen, a senior home appliance technician. "By understanding the basics of these error codes, homeowners can resolve many issues without needing technical assistance."
In rare yet more stubborn cases, your oven might throw a curveball like the F8 error. This is usually associated with a power relay board problem. Fixing this involves a bit more technical finesse, as the power relay board is responsible for executing and coordinating commands sent by the oven control board. Frequent power outages can aggravate this, so keeping your oven plugged into a surge protector might not be a bad idea. If the error persists, consulting a technician who understands the quirks of your oven’s make and model can steer you in the right direction.
For a quick reference, a simple chart of these error codes with potential solutions can be handy! It's just like having a mini technician in your pocket. Here’s a glance at how some of these common issues map out:
| Error Code | Description | Potential Solution |
|---|---|---|
| F1 | Sensor or electronic oven control | Restart or replace the control board |
| F2, F3 | Temperature sensor issue | Check or replace the temperature sensor |
| F9 | Door latch problem | Clean or lubricate the latch |
| F8 | Power relay board failure | Replace the relay board |
By getting familiar with these error signals, you'll not only save precious time but avoid hefty repair bills. So, the next time your oven decides to turn into a mysterious oracle with cryptic signs, dive in with confidence. The potential mishaps are far less daunting when you're well-equipped with insight and a dash of patience!