Heat pumps don’t just “go bad” out of the blue. They’re tough, but a handful of silent problems-poor airflow, low refrigerant, electrical faults, bad drainage/defrost, and sloppy installation-add stress until something gives. If you catch the early signs, you save the compressor, cut bills, and avoid a mid-summer failure (been there in Adelaide). This guide shows you what actually breaks heat pumps, how to spot it early, what to do yourself safely, and when to call a pro. Expect plain talk, useful checklists, Australian context, and clear next steps.
- TL;DR: Most failures trace to clogged filters/coil, refrigerant leaks or wrong charge, bad capacitors/contactors, drainage or defrost issues, and installation mistakes.
- Do quick checks: filter, thermostat mode, breakers, outdoor coil, condensate drain, vents open, temperature split.
- Maintenance beats repair: clean filters, wash coils, keep 300 mm clearance, test drains, annual service before summer.
- Repair vs replace: if the unit is 10-15 years old and a major part fails, run the 5,000 rule (age × repair cost). Consider replacement if that number tops the new unit price.
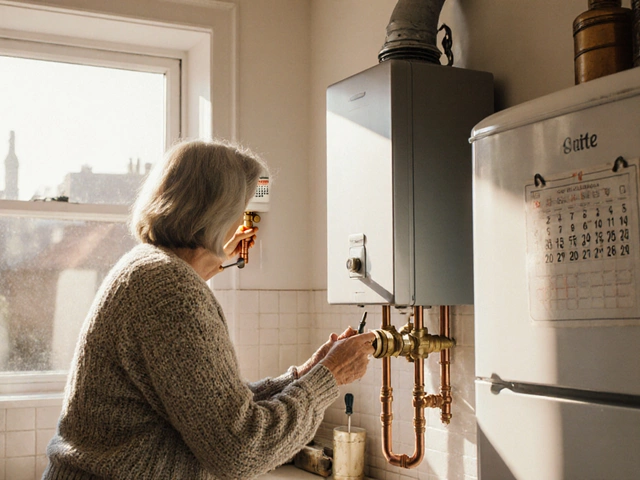
- Safety: power off before touching the unit. Refrigerant and wiring are licensed-pro-only in Australia (ARCtick).
Why Heat Pumps Fail: The Real Culprits
Most breakdowns come from the same core drivers. Fix these, and your system lives longer, runs quieter, and costs less to run. Here’s what actually kills performance and parts.
1) Starved airflow - The system can’t move enough air over the indoor coil. Common causes: a filthy filter, blocked return grille, closed supply vents, dust-matted indoor coil, crushed or undersized ductwork. When airflow drops, coil temperature falls, ice builds, the compressor runs hot, and efficiency tanks. The U.S. Department of Energy notes wrong airflow can slash capacity and efficiency. In homes I see around Adelaide, a forgotten filter is the #1 culprit.
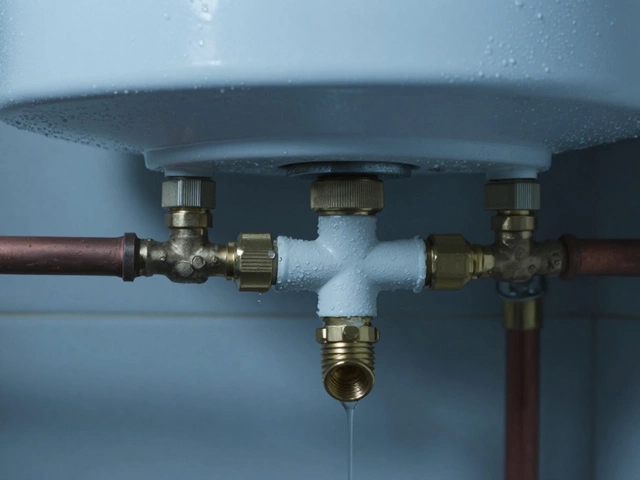
2) Refrigerant mistakes (leaks or wrong charge) - Refrigerant doesn’t “get used up.” If it’s low, there’s a leak. Low charge means lower capacity, longer run times, overheated compressors, and acid formation inside the system. Too much charge is just as bad. Industry bodies like AHRI and ACCA have banged on about this for years: a small charge error can cut efficiency by double digits. With modern Aussie split systems using R32 or R410A, correct charge and proper evacuation with a micron gauge aren’t optional.
3) Electrical weak points - Capacitors dry out, contactors pit and stick, relays chatter, connections loosen from heat and vibration, boards fail after a surge. Heat pumps draw high starting currents; a tired capacitor makes the compressor grunt, stall, then trip. We get summer storms here; one good surge can fry a control board. A simple HVAC-rated surge protector is cheap insurance.
4) Condensate and defrost trouble - A clogged drain stops cooling, trips float switches, or floods ceilings. Outdoors, poor defrost or bad sensors leave the unit encased in ice. In heating mode, light frosting is normal, but a solid block of ice is not. Blocked gutters dumping water on the outdoor unit? Seen it. Rusted pans and broken drain traps also show up in older installs.
5) Installation errors - Wrong size for the space, kinked line set, brazing without nitrogen purge (leaves carbon scale inside), poor evacuation, no vibration pads, or sloppy condensate routing. ACCA Manual J (sizing) and Manual D (ducts) exist for a reason. Oversized units short cycle, never dehumidify properly, and die early. Undersized units run forever and still can’t keep up on a 40°C day.
6) Age, corrosion, and environment - Salt air close to the coast (hello Glenelg) eats coils and fasteners. Sun exposure cooks capacitors. Dust and bushfire smoke clog fins. After 10-15 years, even a well-kept unit will lose some efficiency and reliability.
7) Neglected maintenance - Skipping filter changes and coil cleaning is like running a car with no oil changes. CSIRO has long highlighted basic maintenance as a key energy saver. It’s also a life extender.
Bundle these together and you get the most common heat pump failure causes homeowners face. The good news: plenty is preventable with simple habits.
Early Warning Signs and What to Check First
If you catch issues early, you turn a $2,000 problem into a $200 one. Here’s how to link symptoms to likely causes, with simple, safe checks.
Map the symptom to the cause
- Weak cooling or heating, normal air flow → Refrigerant leak/charge issue, dirty outdoor coil, defrost problem.
- Weak airflow → Clogged filter/coil, blocked return or supply vents, duct problem, failing indoor fan.
- Short cycling (starts/stops often) → Oversized unit, bad capacitor, restricted airflow, dirty coil, mis-sized thermostat placement, low charge.
- Outdoor unit icy for hours → Defrost control or sensor fault, very low airflow, low charge. Light frost that clears every 30-90 minutes is normal.
- Clicking or buzzing, no start → Bad capacitor or contactor, seized motor, low voltage.
- Water around indoor unit → Clogged condensate drain or failed drain pan/trap.
- Spiking energy bills with same comfort → Dirty coils, low refrigerant, duct leaks, dying compressor losing efficiency.
- Hissing indoors when off → Possible refrigerant leak at the air handler or line set.
Quick, safe checks you can do now (power hazards are real; turn off power at the isolator or breaker if you’re opening panels):
- Thermostat sanity check - Set to the right mode (Cool/Heat), fan on Auto. Nudge the setpoint at least 2-3°C past the room temp to force a clear call.
- Filter - If you can’t see light through it, it’s dirty. Clean or replace. In summer, check monthly. In Adelaide’s dusty spells, don’t wait.
- Indoor airflow path - Open all supply vents. Clear furniture/rugs. Make sure the return grille isn’t smothered by a bookcase or a wall hanging.
- Outdoor unit - Hose off the coil fins from the inside out with a gentle spray. Don’t bend fins. Clear 300 mm around all sides. Lift leaves and lint out of the base.
- Power - Check the outdoor isolator is on. Check the breaker hasn’t tripped. If it trips again on a restart, stop and call a tech.
- Condensate drain - Find the drain line and make sure it’s not blocked. A wet/dry vac on the outside drain for 30 seconds often clears algae and gunk. Avoid blowing back toward the unit; you’ll push muck into the pan.
- Temperature split test - After 10-15 minutes of running, measure supply air vs return air temperature with a simple thermometer.
- Cooling: expect roughly a 8-12°C drop (e.g., 26°C return, 15-18°C supply) in typical indoor humidity. High humidity or very dirty coils change this.
- Heating: expect roughly a 10-20°C rise depending on outdoor temperature and unit size.
- Way off? Think airflow or refrigerant issues.
Simple decision path
- If filter/vents/coil clean-up restores normal temps and noise → keep an eye on it; book a service if problems return.
- If the outdoor fan runs but the compressor is quiet or grunts → likely capacitor/contactor/compressor issue; call a pro.
- If the unit ices up again within hours after cleaning → possible low charge or defrost sensor fault; pro job.
- If water keeps dripping after you vacuum the drain → the pan or trap may be damaged; pro job.
- If breakers trip more than once → stop there and call; repeated resets can do real damage.
Noises and smells decoded
- Metallic rattle → Loose panel or fan blade. Tighten accessible screws with power off.
- High-pitched squeal → Fan motor bearings. Don’t oil sealed motors; they need replacing.
- Electrical buzz with heat smell → Contactor/board issue. Kill power and call.
- Musty smell on start-up → Dirty coil/drain. Clean and run fan-only for 15-30 minutes after.
Simple Maintenance That Extends Life
Think of this as the 80/20: a few small habits stop most breakdowns and keep bills down. Here’s a practical schedule tuned for Aussie conditions.
Monthly in summer (and after dust/smoke events)
- Rinse outdoor coil gently. If you can’t see daylight through the fins, it’s dirty.
- Check the filter. Clean or replace as needed. Keep a spare on hand so you don’t procrastinate.
- Peek at the condensate drain outside. A slow drip while cooling is normal; zero drip on a humid day can mean a clog.
Every 3 months
- Vacuum return grilles and indoor coil face (if accessible without removing sealed panels).
- Trim shrubs; keep 300-600 mm clear around the outdoor unit and 1 m overhead.
- Make sure the outdoor unit is still level. A tipped slab stresses piping and the compressor.
Annually (best before the first 30°C week)
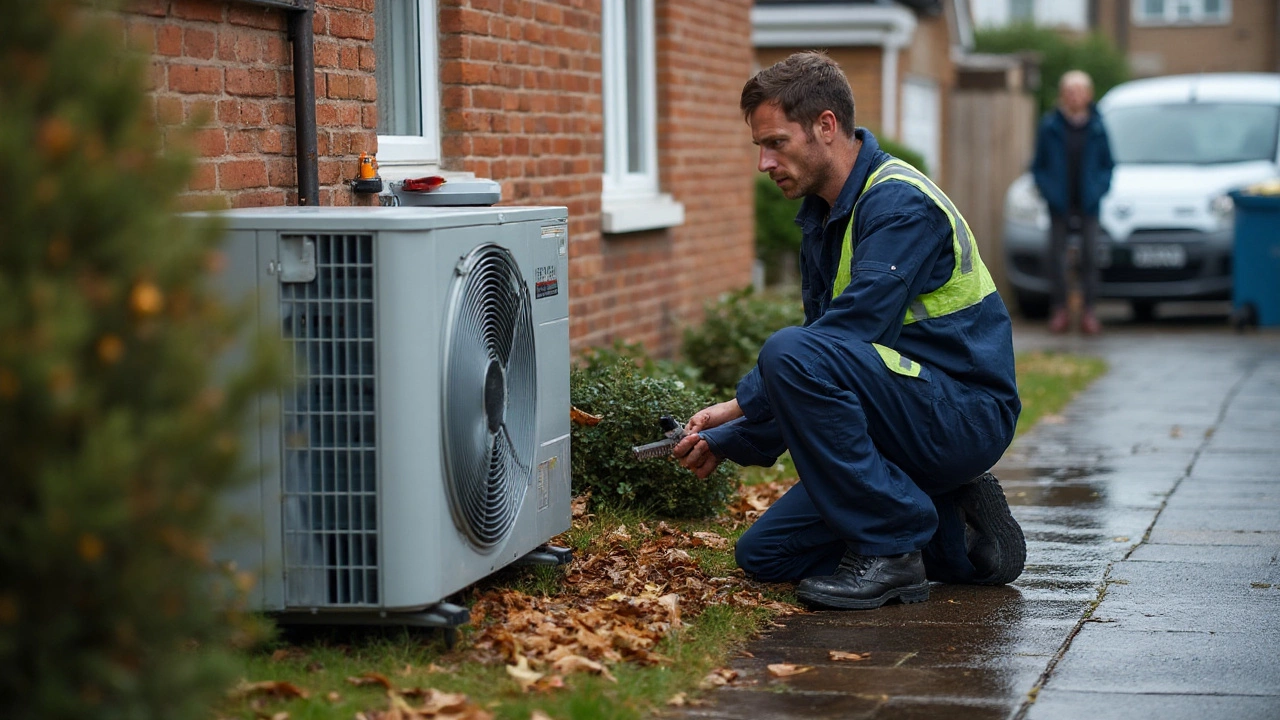
- Book a licensed tech for a service: coil cleaning, electrical checks, test capacitors and contactors, confirm defrost, verify charge properly (weigh in or by measured superheat/subcool), inspect for oil stains on lines.
- Ask for a duct check. Leaky or undersized ducts kill comfort and efficiency. A quick static pressure test tells a lot.
- Add an HVAC-grade surge protector if you don’t have one.
Habits that add years
- Use reasonable setpoints. In summer, aim for 24-25°C indoors. In winter, 19-20°C. Every degree counts on your bill and compressor wear.
- Avoid rapid on/off cycling. If you turn it off, wait 5 minutes before turning it back on to let pressures equalize.
- Keep doors and windows shut during operation. Moist air in summer makes the system work harder to dehumidify.
- If you’re coastal, consider a corrosion-resistant outdoor unit or a coil coating at replacement time.
What a good pro service actually includes
- Electrical: tighten lugs, inspect wiring insulation, measure start/run capacitors, test contactor coil and points, verify voltage drop.
- Refrigerant circuit: leak inspection (electronic/sniffer + UV dye if needed), confirm charge via superheat/subcool, check for non-condensables, inspect filter-drier.
- Airflow: measure temperature split, check static pressure, confirm blower speed settings, inspect coil cleanliness.
- Defrost/controls: sensor readings, board test, thermostat calibration, safety switches.
Energy bodies like the U.S. DOE and CSIRO keep repeating the same message because it’s true: a correctly charged, clean, well-ventilated heat pump can deliver its rated efficiency for years. Skip the basics and the compressor pays the price.
Repair vs Replace in 2025: Costs, FAQs, and Next Steps
Not every fault means a new system. But some repairs don’t make sense on an ageing unit. Here’s how I advise homeowners in Adelaide to decide, with frank cost ranges so you’re not guessing.
Typical Australian repair ranges (parts + labour, GST varies by provider)
- Run/start capacitor: $120-$300
- Contactor/relay: $180-$350
- Indoor or outdoor fan motor: $400-$900
- Thermistor/sensor: $150-$300
- TXV/EEV issue: $600-$1,200
- Leak find and fix: $300-$600 (search) + repair cost + recharge
- Refrigerant recharge: depends on gas and quantity. R410A commonly $200-$400 per kg including labour; R32 varies. Recharges without leak repair are wasted money.
- Compressor replacement: $1,800-$3,500+ depending on size and brand
- Main control board: $400-$1,100
Repair or replace? Use these rules of thumb
- The 5,000 rule: age (years) × repair cost ($) > replacement price ($)? If yes, lean toward replacement. Example: 12-year-old unit × $800 = $9,600. If a comparable new install is $4,500-$6,500, replacement is smarter.
- Age 10-15 years with a bad compressor or coil → replace. You’ll get newer refrigerant, better SEER/efficiency, and a fresh warranty.
- Under 8 years and a minor part failed (capacitor, sensor) → repair, then double down on maintenance.
- Multiple leaks over time → consider replacement. Leaky systems often keep leaking, and refrigerant isn’t cheap.
Licensing, refrigerants, and safety (Australia)
- Only licensed technicians (ARCtick) can handle refrigerant. No top-ups DIY. It’s illegal and unsafe.
- Modern splits often use R32 (A2L mildly flammable). Install and repairs need proper handling and ventilation awareness.
- Get a detailed invoice stating fault found, parts replaced, and refrigerant added by weight. That’s your paper trail for warranty and future diagnosis.
Mini‑FAQ
- Does a heat pump need yearly service? Yes. One thorough service a year catches small problems before they kill efficiency or parts.
- Can I just add refrigerant? No. If it’s low, there’s a leak. Topping off is a band-aid and can destroy the compressor.
- Is ice on the outdoor unit normal? A thin frost that clears during defrost is fine. A solid ice block for hours is not.
- Why does it smell musty? Microbial growth on the indoor coil or in the drain pan. Clean coil and drain, then run fan-only to dry it.
- What temperature should I set? For comfort and cost, 24-25°C cooling, 19-20°C heating in Adelaide’s climate.
- Will a surge protector really help? Yes. It won’t save you from a direct lightning hit, but it protects boards and capacitors from everyday spikes.
Next steps based on your situation
- If the unit runs but comfort is off: Do the filter/coil/vent checks, test the temperature split, clear the drain. If still poor, book a tech and mention the symptoms and your readings.
- If it won’t start: Check mode and setpoint, then breakers and isolators. If the outdoor fan runs but it hums and trips, likely capacitor/contactors. Call a pro; mention any noises.
- If it ices up: Thaw it fully by running fan-only for an hour, clean the filter and outdoor coil, then try again. If frost returns, you need a leak/defrost diagnosis.
- If water is dripping: Vacuum the drain outside, then run cooling and check for a steady drip. No drip on a humid day means a clog persists; book service to clean the pan and trap.
- If you’re deciding to replace: Get at least two quotes. Ask for proper sizing (Manual J style), duct check, noise ratings, and corrosion resistance if you’re coastal. Check local energy ratings; higher star counts pay back in bills here.
Pro tips from the field
- Record data: Take photos of your filter date, coil condition, and thermostat readings. A simple log helps spot trends before failure.
- Mind the set-and-forget myth: Small schedule tweaks (like pre-cooling ahead of a 40°C spike) reduce peak strain and bills.
- Shade without choking: A shade sail above the outdoor unit cuts radiant heat but keep airflow clear on all sides.
- Don’t quiet it with covers: Sound blankets and tight boxes suffocate the unit. Noise goes down, temperature and wear go up.
Reality check: most “dead” heat pumps I’m called to see in Adelaide aren’t dead-they’re suffocating from dust, struggling with low refrigerant from a tiny leak, or waiting for a $200 capacitor. Catch it early, and you keep your cool when the mercury spikes.