Replace Oven Element – Everything You Need to Know
When working with replace oven element, the process of swapping out a faulty heating component in an electric oven. Also known as oven heating element replacement, it restores heat distribution and cooking performance. Oven Heating Element is the metal coil that turns electricity into heat inside the oven cavity is the part you’ll be handling, and it’s usually made of a nickel‑chromium alloy that can survive high temperatures. The job belongs to a Appliance Technician a qualified professional who understands electrical safety and appliance diagnostics, but many homeowners can do it themselves with the right precautions.
Why the Oven Element Fails and What It Affects
Most oven problems trace back to three main reasons: a burnt coil, a broken connection, or age‑related wear. A burnt coil will show visible black spots or a broken wire; a loose connection often causes intermittent heating; and old elements simply lose efficiency over time. When any of these happen, the Electric Oven the kitchen appliance that uses electric heating elements for baking and roasting may heat unevenly, take longer to reach set temperatures, or not heat at all. Replacing the element fixes those symptoms and brings your oven back to reliable performance.
Here are the key steps that link the entities together: replace oven element requires turning off the power, removing the old coil, checking the wiring, and installing a new one. The process requires basic electrical safety knowledge, involves the oven heating element itself, and benefits from the expertise of an appliance technician if you’re unsure. Those connections form a simple chain: a faulty element leads to poor heating, which the replacement resolves, and safety is ensured by proper handling.
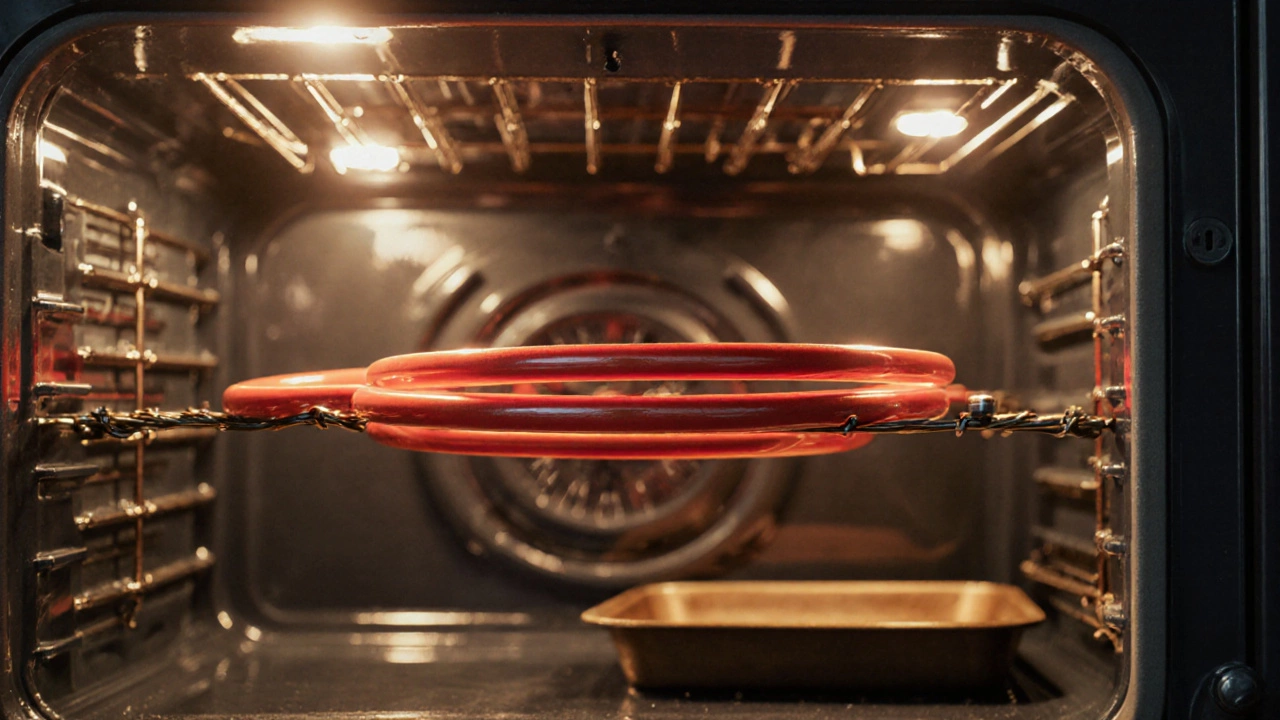
Before you start, gather a few tools: a screwdriver set, a multimeter, gloves, and the correct replacement element (make sure the part number matches your oven model). Safety first – cut power at the circuit breaker and double‑check with a multimeter that the circuit is dead. Once you’re sure, remove the oven racks, locate the element (usually at the back or bottom of the oven cavity), and detach the mounting screws. Pull the element out gently, taking note of how the wires are attached, then disconnect them using the multimeter to confirm no voltage is present.
Installation is the reverse of removal. Hook the wires onto the new element’s terminals, secure it with the original screws, and replace the oven racks. Restore power and run a quick heat test – set the oven to a moderate temperature and watch if the element glows red after a few minutes. If it heats evenly, you’ve successfully replaced the oven element. If not, double‑check the wiring or consider calling an appliance technician for a deeper diagnostic.
Cost-wise, a standard oven heating element runs between £30 and £80, depending on brand and oven type. Labor adds another £50‑£100 if you hire a professional. In many cases, the DIY route saves you half the expense, but remember that a mistake can damage the oven’s control board, which is much pricier to replace. Weigh the risk versus savings, especially if your oven is older than ten years – sometimes replacement of the whole oven is more economical.
Overall, knowing how to replace an oven element empowers you to tackle a common kitchen issue quickly and cheaply. In the list below you’ll find articles that dive deeper into each piece of the puzzle: diagnosing element problems, choosing the right replacement, safety checklists, and cost breakdowns. Armed with this background, you’ll be able to pick the right guide for your situation and get your oven back in action faster.