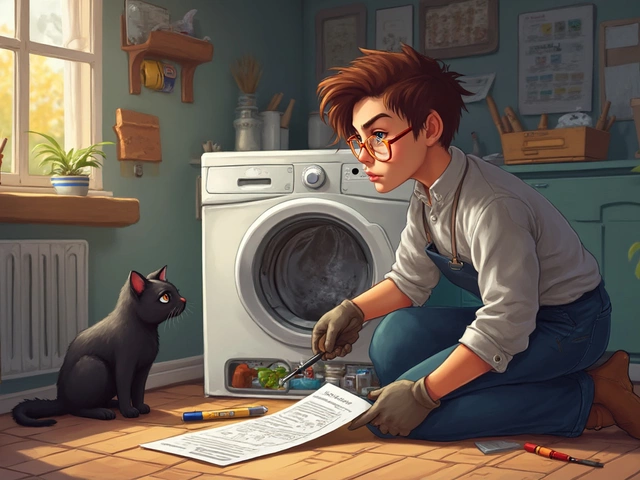
So, your dryer's on the fritz? Before you pick up the phone to call in the cavalry, consider rolling up your sleeves. You might be surprised at how fixable some of those annoying problems are, with a bit of know-how and elbow grease. Besides, DIY repairs can save you a pretty penny and the satisfaction that comes from solving problems can be pretty rewarding, don’t you think?
First things first, let's talk about why you should even consider tackling this yourself. The average cost for a professional dryer repair can start from $150 and skyrocket if parts need to be replaced. However, many common issues like a broken dryer belt, a clogged vent, or even a finicky thermostat may only require a few inexpensive parts and tools that you might already have lying around.
If you've ever thought about the inner workings of your dryer, it's not as complicated as it seems. Most tumble dryers operate on basic mechanical and electrical principles. This means that with some basic knowledge, you can figure out what’s gone wrong and give it a shot to fix it.
- Why Fixing It Yourself Is Worth It
- Common Dryer Problems and Solutions
- Essential Tools for the Job
- Safety First: Precautions and Preparation
- Step-by-Step Troubleshooting Guide
- Knowing When to Call a Professional
Why Fixing It Yourself Is Worth It
Tackling a broken dryer on your own might sound daunting, but trust me, it's worth it in more ways than one. Not only do you save yourself a wad of cash, but you also pick up some handy repair skills that could come in handy in the future. Plus, there's just something so satisfying about taking control of your home maintenance.
Let’s talk cost savings—one of the biggest motivators for a DIY dryer fix. On average, hiring a technician can set you back at least $150, not including parts. Now, imagine if it turns out to be a simple issue like a clogged vent or a misaligned drum. The parts themselves might only cost $20 or less!
Learn Something New
Ever wonder what's behind that metal drum? Once you dive in, you'll see a dryer isn't that complicated. It’s all about basic components like belts, rollers, and thermostats. Learning how to diagnose and repair these parts not only boosts your confidence but is also a feather in your cap.
Besides, who doesn’t like to look like the hero when a household appliance decides to take a day off? You’d definitely earn some serious brownie points from family or roommates.
Reduce Your Carbon Footprint
By fixing your current dryer rather than replacing it, you're doing your bit to reduce waste and help out Mother Earth. Tossing out less means keeping landfills a bit emptier, not to mention saving the resources needed to produce new machines.
Considering these clear benefits, next time your tumble dryer acts up, pause for a second before dialing that service number. It might be time to unleash your inner handyman and take a closer look.
Common Dryer Problems and Solutions
It's not unusual for tumble dryers to act up every now and then. Most of the time, the issues are pretty common with straightforward fixes. Let’s break down some of the typical trouble spots and how you can handle them.
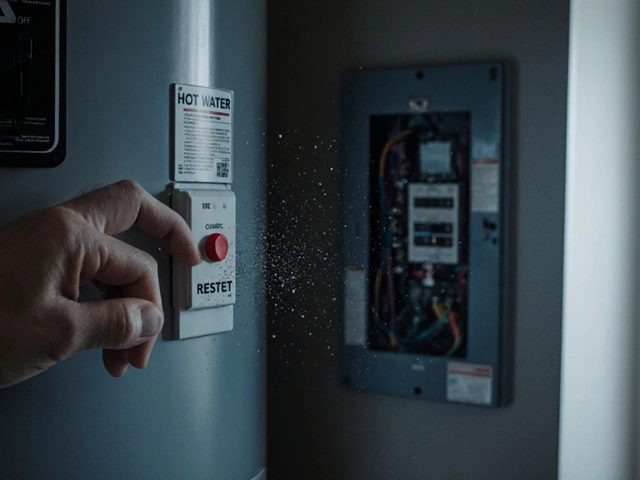
1. Dryer Doesn't Turn On
This has got to be one of the most nerve-wracking problems. But before you panic, check if the dryer is properly plugged in and the circuit breaker hasn't tripped. If those aren't the culprits, the thermal fuse might have blown. This little device is designed to protect your dryer from overheating.
- To replace a thermal fuse, disconnect your dryer from power.
- Locate the fuse (usually at the exhaust vent inside the back panel).
- Remove the faulty fuse and install a new one.
2. Dryer Not Heating
If your clothes are still damp after a cycle, the heating element might be the issue. This element is essential for heating the air inside the dryer drum.
- Unplug the dryer and remove the back panel to locate the heating element.
- Test it with a multimeter to see if it’s faulty. A broken element would show no continuity.
- Swap it out for a new one if needed.
3. Unusual Noises or Vibrations
Unwanted noise often means that the drum rollers or bearings have worn out. They help support the drum, so if they’re faulty, you'll hear rattling or thumping sounds.
- Open up the dryer's cabinet.
- Inspect the rollers and bearings for wear and tear.
- Replace them if necessary.
4. Clothes Not Drying Properly
Sometimes, the culprit is a clogged vent which can hinder air flow. Regular cleaning is key.
- Remove the vent duct and clear out any lint or debris.
- Check the vent flap (the outside bit) to ensure it’s not blocked.
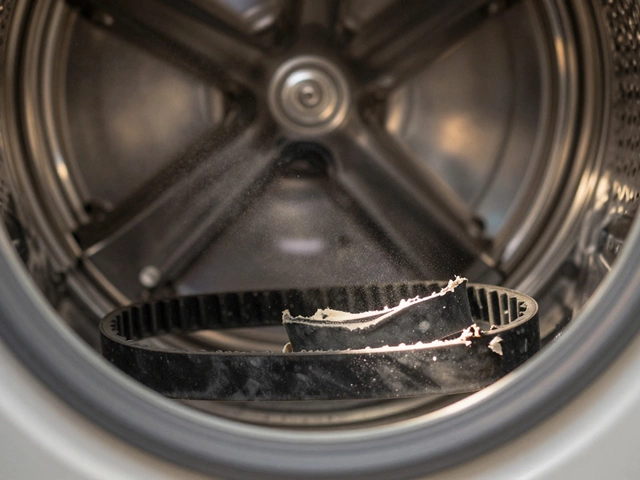
5. Dryer Drum Doesn't Spin
If your dryer turns on but the drum won’t spin, the drive belt might be the culprit. Without it, the drum can’t rotate.
- Take off the back panel to access the belt.
- Inspect it for wear and replace it if you find any damage.
If you're ever stuck on a solution, remember there’s no shame in looking up a quick YouTube tutorial or consulting the dryer’s user manual. And when in doubt, call a professional if the issue’s beyond your skillset or comfort level.
Essential Tools for the Job
Getting started on any DIY project means gathering the right tools, and fixing your tumble dryer is no exception. You'll be pleased to know that many of the tools you'll need are likely already in your toolbox.
Basic Must-Haves
Start with the essentials, and if you've ever put together a flat-pack, you probably have most of these:
- Screwdrivers: Both a Phillips and a flathead screwdriver are vital for accessing the dryer's inner parts.
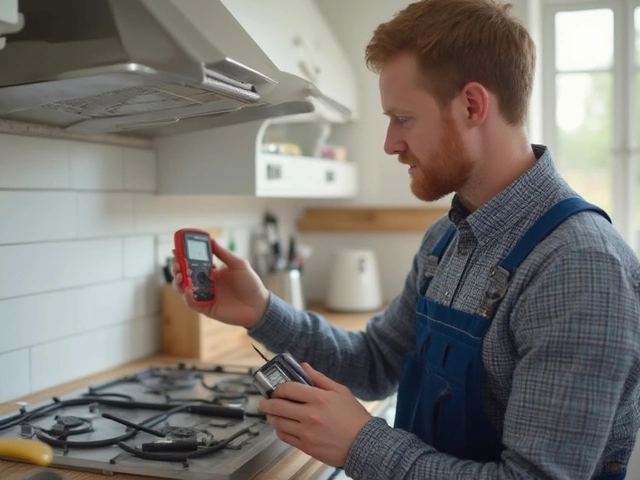
- Multimeter: This handy little gadget lets you test electrical connections, so you know what parts are causing the problem.
- Wrenches: An adjustable wrench can help you tackle various nut sizes without needing a whole set.
- Needle-nose pliers: These are great for gripping small parts and pulling wires.
Specialized Tools
Depending on your dryer's problem, you might need these additions:
- Drum belt: If the drum isn't turning, a new belt might be in order. It’s an easy fix and a common culprit when your dryer refuses to spin.
- Vacuum cleaner: Clogged vents or lint traps? A vacuum cleaner with a hose attachment can clear away dust and debris.
- Wire stripper: For replacing or fixing electrical components, a wire stripper is a lifesaver.
Safety Gear
Don’t skimp on safety, folks! Always have these on hand:
- Gloves: Protect your hands from sharp edges and give yourself a better grip.
- Safety glasses: Always a smart move to shield your eyes when you're poking around inside machinery.
Dryer maintenance can seem daunting, but having the right tools makes the process smoother. Plus, you'll feel way more prepared to tackle any dryer troubleshooting issues that come your way.
Safety First: Precautions and Preparation
Before you start tinkering with your tumble dryer, it's crucial to think safety first. Messing around with a household appliance might seem like a breeze, but things can get risky if you’re not cautious. Here’s how you can avoid any unpleasant surprises and keep things safe.
Unplug and Play It Safe
Always, and I mean always, unplug your dryer before you even think about taking it apart. Electricity and DIY don't mix well if you’re not careful. So, make sure your dryer isn’t connected to a power source. If you skip this step, you’re literally playing with fire (or at least a good shock).
Gather Your Gear
Having the right tools at hand can make your repair smoother. Common tools include a screwdriver set, a multimeter for checking electrical connections, and potentially some pliers. A flashlight can also be helpful for those hard-to-see areas inside your dryer.
- Screwdriver Set
- Multimeter
- Pliers
- Flashlight
A Little Clean-Up Goes a Long Way
If your dryer has been in use for a while, lint buildup might be a thing. Before you crack open the machine, give it a good clean. Pull out the lint trap, and make sure you vacuum out whatever debris you can find. This will not only make your repair job easier but also improve the dryer’s performance.
Check the Heat Source
Your dryer is either electric or gas, and knowing which one you have matters. For those dealing with a gas dryer, ensure the gas supply is turned off. And remember, if you smell gas while working, abort the mission and call a pro.
Research and Read Up
Finally, before diving in, do some homework. Whether it's watching a step-by-step video or reading the dryer’s manual, make sure you know what you're getting into. Understanding your specific model's quirks can save you a lot of headaches.
Taking precautions may take some time, but it’s way better than risking more harm than good. Plus, it sets you up for a repair that’s smooth sailing. Now, are you ready to tackle that DIY dryer fix?
Step-by-Step Troubleshooting Guide
Taking charge of your own tumble dryer repair might sound intimidating, but breaking it down into manageable steps makes it much simpler. Let’s get to it.
1. Check the Power Supply
It might sound obvious, but start by confirming your dryer is properly plugged in and the outlet is working. Try plugging in a different device to ensure there's no issue with the outlet itself.
2. Inspect the Door Switch
Dryers won't start if the door isn't fully closed. Ensure the door switch is functional. If pressing it doesn't produce a clicking sound, the switch might be faulty and require replacing.
3. Examine the Lint Filter and Venting
A clogged lint filter can reduce efficiency and even cause fires. Make sure it's clean. Also, check the venting system for any blockages. Lint build-up here can seriously impact performance.
4. Test the Thermal Fuse
The thermal fuse prevents overheating. If it’s blown, the dryer won’t run. Use a multimeter to test for continuity. If it’s failed, a replacement is necessary.
5. Look at the Dryer Belt
If your dryer drum isn't turning, it could be a belt issue. Flip your dryer over and inspect the belt for signs of wear or damage. If it’s loose or broken, it’s time to replace it. Here’s a quick tip: Always buy genuine spare parts for the best fit.
| Common Dryer Issues | Possible Causes |
|---|---|
| Won't Start | Power supply, door switch, thermal fuse |
| Not Heating | Thermal fuse, thermostat, heating element |
6. Assess the Thermostat and Heating Element
A dryer not drying could be due to these components. Use a multimeter again to check for continuity in the thermostat and heating element. Replace if necessary. Remember, some fixes are as easy as multiple choice—if it's neither of those, it might be something more complex.
7. When to Wave the White Flag
If you've gone through these steps and the problem persists, it might be time to call a professional. It’s okay not to have all the answers, and an expert can take it from here. Besides, it might be good to keep a few hairs on your head!
Tackling these steps could solve many common dryer problems and reawaken that stubborn appliance. From electrical checks to swapping out dryer parts, understanding your dryer can keep it running like a champ for years to come.
Knowing When to Call a Professional
Sometimes, even the most adept DIY enthusiast might hit a snag that’s beyond fixing at home. So, how do you know when it’s time to throw in the towel and call for expert help? Here's a lowdown on recognizing those tricky situations.
Signs That Point to a Pro
If you’ve been kneeling in front of your tumble dryer scratching your head, here are a few things to watch out for that typically require a seasoned professional:
- Unusual Noises: If you hear loud banging, squealing, or grinding, it might indicate deeper mechanical issues. Loose or damaged parts inside the dryer drum or motor can become more harmful if not correctly addressed.
- Electrical Faults: Serious electrical problems, such as a persistent burning smell or your dryer tripping the circuit breaker, shouldn't be ignored. These could pose safety hazards—call an electrician to avoid risks.
- Complex Mechanical Problems: If a component like the motor or control board fails, you’ll need more than just a screwdriver. MG motors and PCB replacements often require specialized knowledge or tech certification.
- Persistent Issues: Suppose you've tried all the DIY fixes in the book, and your dryer still acts up. In that case, there could be an obscure issue only a trained eye can spot.
Evaluating Repair Costs
When debating between DIY and hiring a repair technician, consider the costs. If fixing it yourself requires ordering parts and buying special equipment that equals hiring a pro, it’s probably better for peace of mind. Remember, even the best DIY attempt can escalate.
| Repair Type | Average Cost |
|---|---|
| Belt Replacement (DIY) | $20 - $40 |
| Belt Replacement (Professional) | $100 - $150 |
| Motor Replacement (Professional) | $200 - $400 |
Warranty Considerations
Finally, if your dryer is still under warranty, any attempts at DIY repairs could void those terms. Not worth it, right? It's safer to leave it to the professionals and let them handle it under the warranty plan.
While going it alone with your DIY dryer fix can be fulfilling and cost-effective, knowing when it’s smarter (and safer) to kick back and let a professional take over is crucial. Balance the benefits of saving money with the assurance of a job well done when needed.