Ever had one of your electric hob burners stop working and thought, 'This is going to cost me a fortune at a repair shop'? Relax, a non-working hob element might just need a replacement, and you don't always have to call in an expert to get it done.
Let's start by understanding what you're dealing with. An electric hob, in simple terms, uses electrical heating elements beneath each cooking zone. They can wear out over time or fail suddenly, thanks to things like frequent use or accidental spills. If one burner stops heating up, it might be time to replace that element. But first, how can you be sure it's the element that's faulty?
You don't need to be a technician to find out if your hob element is busted. Simple signs like the burner not heating up, uneven heat distribution, or visible damage can be good indicators. Once you've figured out the problem, replacing the element is the next step.
Replacing an element might sound complicated, but with a few basic tools, some patience, and safety precautions, you can do it. Always ensure the hob is completely turned off and disconnected from the power before you start tinkering. Safety first, right?
- Understanding Electric Hob Elements
- Identifying When an Element Needs Replacement
- Steps to Replace an Electric Hob Element
- Safety Tips and Handy Advice
Understanding Electric Hob Elements
Electric hobs are the heart of many kitchens, working tirelessly to heat up our meals. But have you ever wondered what keeps them ticking? Let's break it down.
An electric hob is essentially a flat surface with burners that are activated electrically. Underneath each burner lies a heating element. These elements are usually made from coiled metal, like nichrome, which heats up when electricity passes through it, transforming energy into heat.
Types of Electric Hob Elements
There are a few different versions you may encounter:
- Solid Plate Elements: These are the traditional cast iron plates we often see. They take time to heat up and cool down.
- Glass Ceramic Elements: The sleek-looking hobs where the element sits under a glass top. They heat quickly and give an even surface to work on.
- Induction Elements: These use a magnetic field to heat only the cookware. Though they're efficient, they require induction-friendly pots.
Each type of element offers certain advantages and drawbacks, depending on your cooking habits and what you value in a hob.
How They Work
When you turn on a burner, the control knob or touch panel sends power to the selected electric hob element. The element heats up, and depending on the type, either directly heats the cookware or first transfers heat to the glass surface.
Common Issues
Over time, hob elements can suffer from wear and tear due to constant heating and cooling cycles. Issues like the element not heating, only half heating, or sparking are common indicators that something's off.
Understanding your hob element can save you time and trouble when diagnosing problems. Knowing what type you have and how it operates is the first step in effective repair or replacement.
For instance, if you're regularly experiencing uneven heating, it could be due to a malfunctioning element. Recognizing these signs can guide you toward the right solution, whether it's a DIY repair or a professional call.
Identifying When an Element Needs Replacement
Knowing when your electric hob's element needs replacing isn't rocket science, but it does require a bit of attention to detail. If your burner refuses to cooperate, it might be time for a closer inspection.
Common Signs of a Faulty Element
Before you rush off for replacement parts, look for these telltale signs that your electric hob repair might be required:
- No Heat or Inconsistent Heating: The most obvious sign. If one burner stays cold or heats unevenly, that's a red flag.
- Visible Damage: Check for cracks, burn marks, or other damage on the surface of the element.
- Tripping the Circuit Breaker: A faulty element might cause the circuit breaker to trip when turned on.
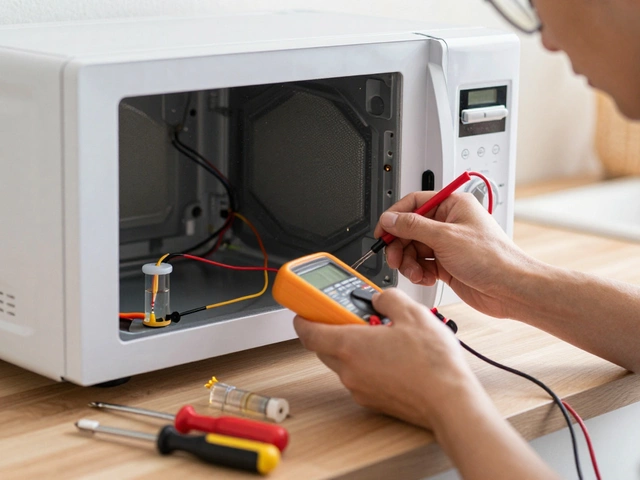
Using a Multimeter
To be absolutely sure, a multimeter can help confirm if the element's at fault. Here's a quick guide to testing it:
- Ensure the hob is completely off and unplugged for safety.
- Remove the element, following the manufacturer's instructions.
- Set the multimeter to the ohm setting.
- Touch the probes to the element's terminals. A healthy element usually shows a resistance reading in a specific range (check your appliance manual). If it's out of range, replacement is due.
A Practical Tip
It's often smartest to check all other potential issues first. Sometimes, a non-working hob could be due to something as simple as a clogged burner or a faulty switch. Rule these out before diving into full-blown hob element replacement.
Replacing an element can seem daunting initially, but with these signs in hand, you'll be better prepared to tackle your kitchen nemesis head-on!
Steps to Replace an Electric Hob Element
Tackling the task of replacing an element on your electric hob is a great way to save some cash and upgrade your DIY skills. But don’t rush in without proper prep! Here’s a step-by-step guide to help you get the job done.
Gather Your Tools
Before you start, make sure you have all the basic tools you'll need:
- Phillips or flathead screwdriver
- Multimeter (to check if the element is really dead)
- Replacement hob element (check the model number to ensure compatibility)
Power Down and Safety First!
Always prioritize safety. Disconnect your hob from the mains. It’s not just about flicking off the switch; unplug it completely. Electricity is no joke!
Getting Inside the Hob
The trickiest part is getting to the innards of your hob. Here’s how you do it:
- Remove any knobs or covers. Usually, they lift straight off.
- Unscrew the top of the hob from its mounted position. Keep the screws in a safe place–you'll need them later.
- Lift the hob surface carefully to access the elements underneath.
Identify and Remove the Faulty Element
Once inside, you’ll see the layout of your hob’s elements. Use a multimeter to test which one has blown. No continuity means it’s dead.
- Unscrew the connections holding the busted element in place.
- Carefully disconnect any wires. Snap a picture before you do, so you know how to reconnect them properly.
Install the New Element
Time to replace the dud with your shiny, new element:
- Connect the wires to the new element. Follow your photo so you don’t make mistakes.
- Secure the element in place with screws, ensuring a snug fit.
Reassemble and Test
Piece everything back together. Here’s how:
- Lower the hob surface and screw it back in.
- Reattach any knobs or covers you removed earlier.
- Plug the hob back into the mains and power it up.
- Test to make sure your new element heats up evenly.
If all’s well, congratulate yourself. You just saved yourself a service call and learned how to revive your kitchen appliance!
Safety Tips and Handy Advice
When tackling a DIY electric hob repair, safety should always be your number one priority. Messing around with electricity can be risky, so taking precautions is crucial to avoid any shocks or further damage to your appliance.
Power Off First
Before you even start thinking about taking your electric hob apart, make sure the power is completely off. Unplug it from the wall if you can or switch it off at the circuit breaker. This isn't just a suggestion—it's a must!
Use the Right Tools
Having the right tools on hand can make all the difference. For electric hob repairs, a multimeter to test electrical connections, screwdrivers, and sometimes needle-nose pliers can be handy. Using improper tools can not only damage your hob but also pose safety risks.
Check the Manual
Your hob's manual can be your best friend during this process. It will give you specific guidance on how to access the elements, what replacement parts you need, and any special instructions for your particular model. No manual? Many manufacturers provide downloadable PDFs online for older models.
Testing for Continuity
If you're in doubt whether the element is truly at fault, using a multimeter to check for continuity can save you from unnecessary replacements. A lack of continuity means that the element is indeed defective.
- Ensure all connections are secure before reassembling the hob. Loose connections can not only be ineffective but dangerous.
- Always wear rubber-soled shoes when working with electrical appliances to avoid any static electricity surprises.
Consider a Professional
Sometimes, a kitchen appliance repair might be above your skill level, and that's okay! If you're unsure or uncomfortable at any step, it might be worth calling a professional. Better to be safe than sorry, especially when electricity is involved.
Following these steps can save you a lot of time and possibly prevent accidents. While replacing a hob element can be straightforward, never underestimate the importance of safety in everything you do. Keep it safe, keep it efficient!